Where is Inverter Located? Find the Best Spot Now!
The exact location of an inverter depends on the specific setup, but commonly it can be found inside an RV or camper. These units are typically installed in a convenient location, such as an electrical cabinet or storage compartment, allowing for easy access and maintenance.
Inverters play a crucial role in converting DC power from batteries to AC power for various appliances and devices while on the go. They are an integral part of powering electrical systems in recreational vehicles. Understanding where the inverter is located is essential for troubleshooting electrical issues and accessing the inverter’s remote panel.
Knowing its precise location ensures efficient use and maintenance of the inverter, providing a reliable power source during travels and adventures.
Benefits Of Locating An Inverter Inside An Rv
The benefits of locating an inverter inside an RV are that it provides easy access for maintenance and troubleshooting, protects the inverter from the elements, and minimizes the risk of damage during travel. This ensures a reliable and efficient power supply while on the road.
Locating an inverter inside an RV offers several advantages, making it a popular choice among RV owners. Let’s explore some of the key benefits of installing an inverter internally:
- Protection from external elements: By placing the inverter inside the RV, it is shielded from various external elements such as rain, snow, dust, and extreme temperature fluctuations. This helps prevent damage and ensures the longevity of the inverter.
- Minimizes the risk of damage: Inverters are sensitive electronic devices that can be easily damaged by external factors. Placing the inverter inside the RV reduces the risk of accidental damage from being exposed to rough terrain, vibrations, or impacts during travel.
- Saves space: Space is often at a premium in RVs, and locating the inverter inside can help free up valuable space for other essential equipment or personal belongings. This is especially beneficial for smaller RVs or those with limited storage capacity.
- Provides easy access and maintenance: Having the inverter installed within the RV allows for convenient access whenever maintenance or repairs are required. It eliminates the need to go outside and provides a hassle-free experience for RV owners.
- Reduces noise and vibration: Inverters can produce noise and vibrations during operation. Mounting them inside the RV helps minimize noise disturbances, creating a quieter and more comfortable living environment for occupants.
- Enhances security: Keeping the inverter inside the RV adds an extra layer of security, as it is less vulnerable to theft or tampering compared to an external installation. This peace of mind is especially valuable when parked in remote locations or overnight stops.
By locating an inverter inside an RV, owners can enjoy these benefits, ensuring the safe and efficient operation of their electrical systems while optimizing their RV living experience.
Considerations For Locating An Inverter Outside An Rv
When considering the location of an inverter outside an RV, it’s important to assess factors such as weather exposure, accessibility for maintenance, and proper ventilation to ensure optimal performance and longevity.
When it comes to the location of an inverter in an RV, there are a few important considerations to keep in mind. Specifically, thinking about easy access for maintenance, cooling requirements, and potential warranty issues can help ensure optimal performance and longevity of your inverter.
Easy Access For Maintenance:
- Proper maintenance is crucial for the smooth functioning of your inverter. Consider the following points when locating it outside your RV:
- Choose a location that allows easy access for routine maintenance tasks, such as cleaning or replacing filters.
- Ensure there is enough space around the inverter for troubleshooting and repairs if needed.
- Keep the inverter away from areas prone to excessive dirt, dust, or moisture, as these factors may impact its performance.
Cooling Requirements:
- Inverters can generate heat during operation, and proper cooling is essential for their longevity. Here’s what to consider:
- Place the inverter in a well-ventilated area to allow for effective heat dissipation.
- Ensure that there is sufficient airflow around the inverter, as restricted airflow can lead to overheating.
- Avoid installing the inverter in direct sunlight, as excessive heat can affect its performance.
Potential Warranty Issues:
- The location of your inverter can also impact warranty coverage and potential issues. Consider the following:
- Check the manufacturer’s guidelines to determine if they have any specific requirements for inverter placement.
- Some manufacturers may void the warranty if the inverter is not installed in accordance with their recommendations.
- Ensure that the inverter’s location adheres to any specified warranty conditions to avoid any potential issues in the future.
By considering these factors when choosing the location for your inverter outside an RV, you can ensure easy access for maintenance, proper cooling, and prevent any potential warranty issues.
Factors To Determine The Best Location For An Inverter
Determining the best location for an inverter depends on factors such as ease of access, ventilation, and proximity to the power source. It is crucial to find a suitable space that promotes efficient operation and minimizes issues like overheating.
When it comes to installing an inverter in your RV, finding the best location is essential for optimal functionality and convenience. Consider the following factors to determine the ideal placement:
Comparing Sunpower and Enphase micro inverters
Tesla inverter vs Enphase: Which is better?
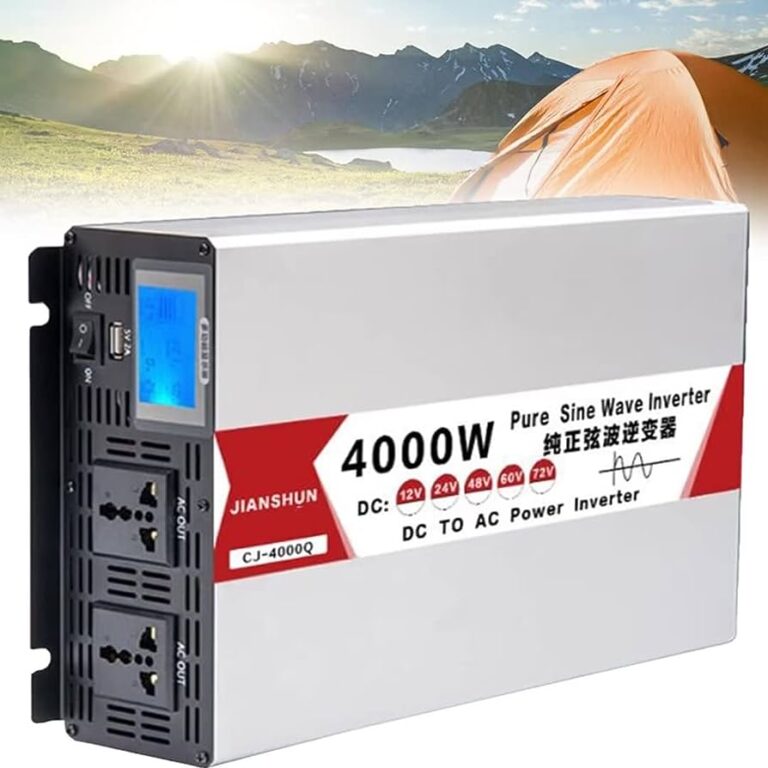
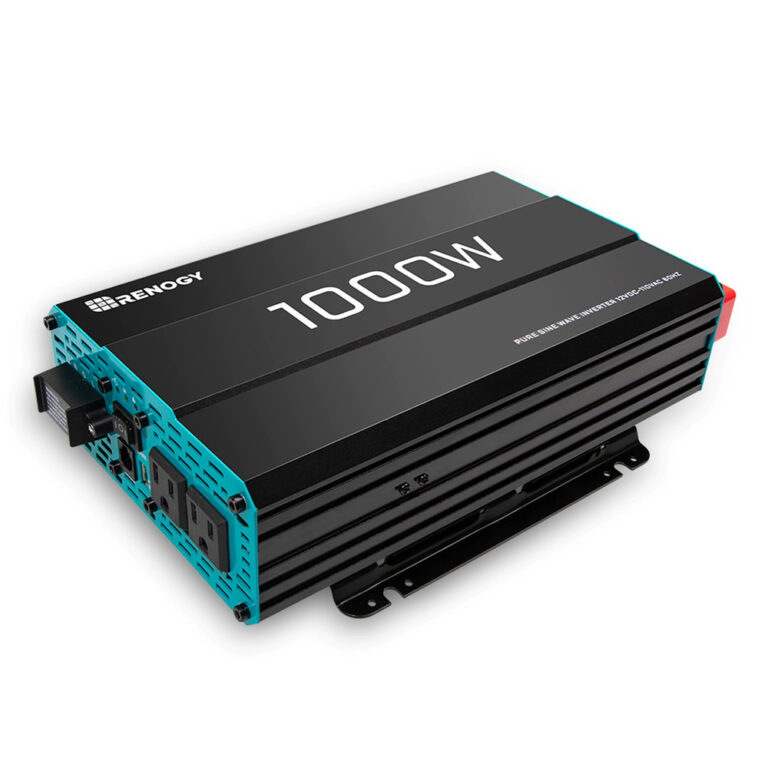
Battery lifespan with a 1000W inverter
Available Space Inside The Rv:
- The first step in determining the best location for an inverter is to assess the available space inside your RV. Look for areas where the inverter can fit without obstructing other components or taking up valuable storage space.
- Take into account the dimensions of the inverter and ensure that there is enough clearance around it for proper ventilation to prevent overheating.
- Consider installing the inverter close to the battery bank to minimize power loss due to long cable runs.
Proximity To Power Sources:
- Another crucial factor to consider is the proximity to power sources. Place the inverter in a location where it can easily access the primary power source, such as the RV’s battery bank.
- Ensure that the cables connecting the inverter to the battery are of the appropriate length and gauge to minimize power loss.
- If you plan to connect the inverter to an external power source, such as shore power or a generator, choose a location that allows for convenient connection points.
Accessibility For Maintenance And Repairs:
- Accessibility for maintenance and repairs is an important consideration when determining the location for your inverter.
- Install the inverter in a location that allows for easy access for routine maintenance tasks, such as checking connections, inspecting wiring, and performing any necessary repairs.
- Consider placing the inverter in a location that is easily accessible but not prone to physical damage or exposure to extreme temperatures or moisture.
By considering the available space inside your RV, the proximity to power sources, and accessibility for maintenance and repairs, you can determine the best location for your inverter. Remember to prioritize functionality, convenience, and safety when installing the inverter to ensure optimal performance during your RV adventures.
Best Practices For Inverter Installation
The best location for an inverter depends on various factors such as the type of inverter and the specific installation requirements. However, common locations for inverters include inside the RV, outside the RV in a dedicated compartment, or in the battery compartment.
When it comes to installing an inverter, there are a few best practices that you should follow to ensure optimal performance and longevity of your equipment. Whether you’re installing it in an RV, camper, or any other application, these guidelines will help you make the most of your inverter installation.
Ensuring Proper Ventilation:
- Place the inverter in a well-ventilated area to prevent overheating.
- Ensure that there is enough space around the inverter for air circulation.
- Avoid installing the inverter in enclosed spaces or areas with high temperatures.
- If necessary, consider installing a cooling fan or additional ventilation system to maintain optimal operating conditions.
Securing The Inverter To Prevent Vibrations:
- Use proper mounting brackets or hardware to secure the inverter in place.
- Avoid mounting the inverter directly onto surfaces that may transmit vibrations, such as metal or fiberglass.
- Use vibration-dampening materials, such as rubber pads or isolators, to minimize the impact of vibrations on the inverter.
Following The Manufacturer’S Guidelines:
- Read and follow the manufacturer’s installation instructions carefully.
- Adhere to the recommended wiring methods and safety precautions outlined by the manufacturer.
- Make sure to use the appropriate wire gauge and circuit protection devices as specified in the manufacturer’s guidelines.
- If you’re unsure about any aspect of the installation, consult with a professional or contact the manufacturer directly for guidance.
Installing an inverter correctly is crucial for its efficient operation and longevity. By following these best practices, you can ensure that your inverter performs optimally and lasts for a long time. Remember, proper ventilation, securing the inverter to prevent vibrations, and adhering to the manufacturer’s guidelines are key to a successful installation.
Tips For Wiring An Inverter In An Rv
The location of the inverter in an RV can vary depending on the model. Some RVs have the inverter installed inside, while others have it placed outside. It’s important to know where your inverter is located for maintenance and troubleshooting purposes.
Understanding The Electrical System Of The Rv:
- The electrical system of an RV consists of a 12-volt system and a 120-volt system.
- The 12-volt system powers the basic necessities of the RV, such as lights, water pump, and appliances that run on direct current (DC).
- The 120-volt system powers larger appliances and devices, such as air conditioners, refrigerators, and TVs, that run on alternating current (AC).
- An inverter is used to convert the DC power from the RV’s batteries into AC power that can be used by these larger appliances and devices.
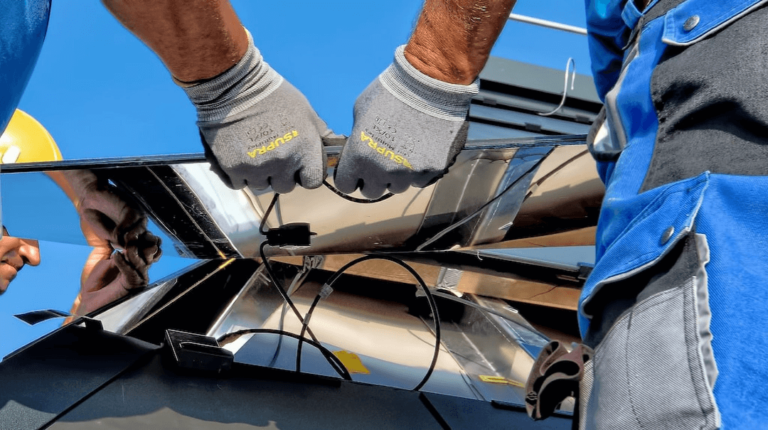
Safely Routing The Wiring:
- When wiring an inverter in an RV, it is important to ensure the safety of both the occupants and the electrical system.
- Follow these tips to safely route the wiring for the inverter installation:
- Plan the route: Before starting the installation, determine the best route for the wiring to avoid any obstructions or potential hazards.
- Use appropriate conduit: Use conduit to protect the wiring from damage and ensure it meets the safety standards for electrical installations in an RV.
- Secure the wiring: Use zip ties or cable clamps to secure the wiring and prevent it from coming loose or getting damaged while traveling.
- Avoid sharp bends: Avoid sharp bends in the wiring as it can cause damage and interfere with the flow of electricity.
- Keep the wiring away from heat sources: Ensure that the wiring is routed away from any heat sources to prevent overheating and potential fire hazards.
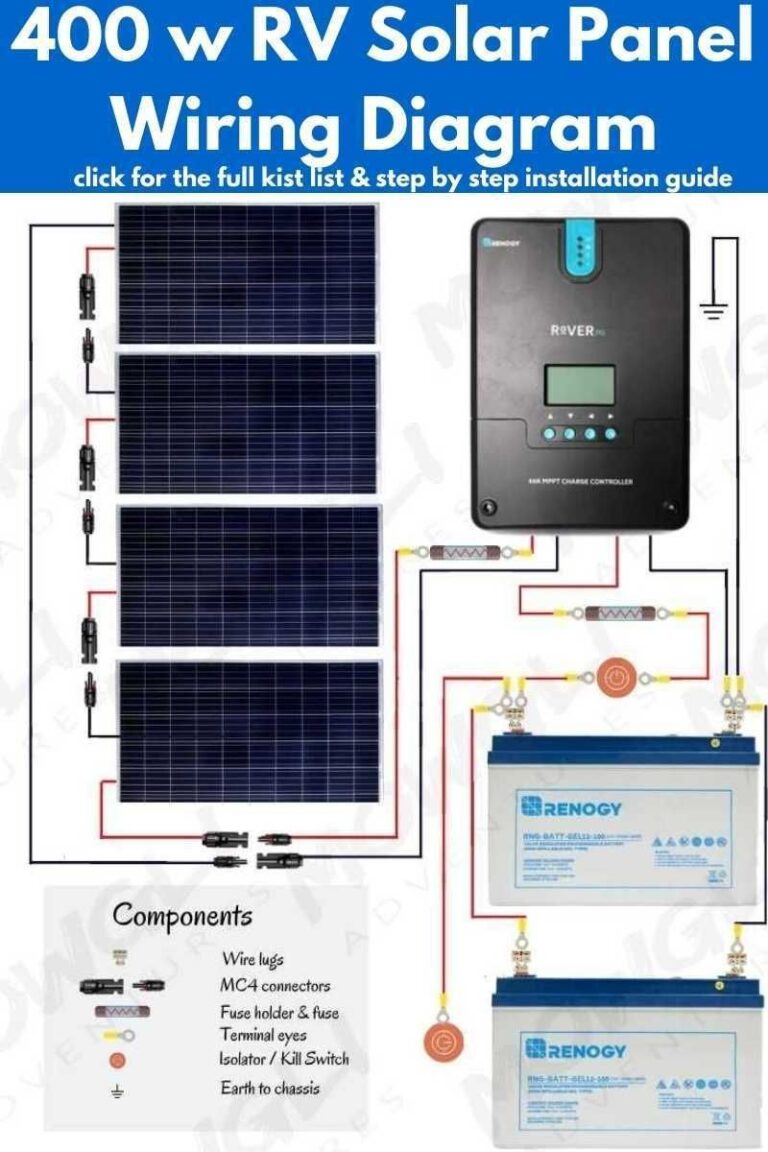
Utilizing Appropriate Wiring Diagrams:
- When installing an inverter in an RV, it is crucial to use appropriate wiring diagrams to ensure a successful and safe installation.
- Wiring diagrams provide a visual representation of the electrical connections and help guide the installation process.
- Here are some tips for utilizing wiring diagrams effectively:
- Understand the symbols: Familiarize yourself with the symbols used in the wiring diagrams to understand the various components and connections.
- Follow the color codes: Wiring diagrams often use color codes to differentiate wires. Make sure to follow these color codes to ensure accurate connections.
- Double-check the connections: Before making any connections, cross-reference the wiring diagram with the actual components to ensure everything is aligned correctly.
- Seek professional help if unsure: If you are unsure about any part of the wiring diagram or the installation process, it is best to seek the assistance of a professional electrician or RV technician.
Remember, properly understanding the electrical system of your RV, safely routing the wiring, and utilizing appropriate wiring diagrams are crucial steps in wiring an inverter. By following these tips, you can ensure a successful and safe installation that will enhance your RV’s electrical capabilities.
Answering Common Questions About Inverter Location
The location of an inverter varies depending on the type of vehicle or system. In RVs, the inverter is often located near the batteries or electrical panel, while in homes, it may be found in a utility room or garage.
It’s important to consult the owner’s manual or seek professional advice to determine the specific location of an inverter.
When it comes to inverter installation, there are a few common questions that RV owners often ask. In this section, we’ll address two of those questions: Can an inverter be installed outside? And Where is the charger/inverter located in Winnebago vehicles?
Let’s dive in and find the answers!
Can An Inverter Be Installed Outside?
- Yes, an inverter can be installed outside, but it’s important to consider a few factors before deciding on the location. Here are some points to keep in mind:
- Protection from the elements: If you choose an outdoor location for your inverter, make sure it is adequately protected from rain, snow, and excessive heat.
- Ventilation: Inverters generate heat when in use, so proper ventilation is essential. Ensure there is enough airflow around the unit to prevent overheating.
- Accessibility: If you plan to access the inverter frequently for maintenance or troubleshooting, choose a location that is easily reachable.
Where Is The Charger/Inverter Located In Winnebago Vehicles?
- In Winnebago vehicles, the charger/inverter is typically located in one of the following places:
- Wardrobe or Closet: Many Winnebago models have a dedicated wardrobe or closet space where the charger/inverter is installed. This location allows for easy access and keeps the unit concealed.
- Utility Compartment: Some Winnebago models have a utility compartment specifically designed to house the charger/inverter. This compartment provides easy accessibility while keeping the unit protected.
- Under the Bed: In certain configurations, the charger/inverter may be installed under the bed. This location maximizes space and keeps the unit out of sight.
Remember, the exact location of the charger/inverter in your Winnebago vehicle may vary depending on the model and floor plan. It’s always a good idea to consult your owner’s manual or contact the manufacturer for specific information.
By addressing these common questions, we hope to provide you with a better understanding of inverter installation, both inside and outside your RV. Whether you decide to install the inverter indoors or outdoors, make sure to consider factors such as protection, ventilation, and accessibility.

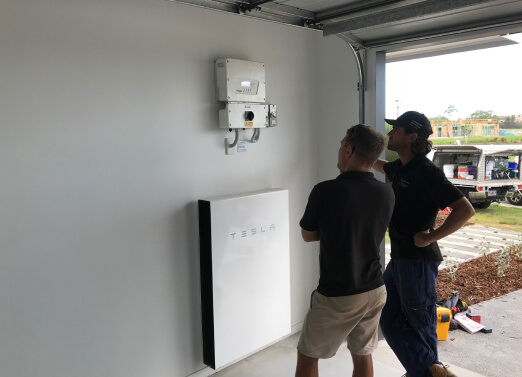
Credit: www.ftccollege.edu
What are the Benefits of Using an AC Inverter for Home Applications?
Using an AC inverter for home applications offers several benefits. It allows you to convert DC power from batteries into AC power, ensuring a reliable electricity supply during power outages. Besides providing energy efficiency, AC inverters minimize noise levels and voltage fluctuations. When selecting the right AC inverter, consider factors such as power requirements, surge capacity, and output waveform, to effectively meet your specific needs.
What materials do I need to make an inverter?
To make an inverter, you will require certain materials. These include a DC power source, such as a battery, transformer, voltage regulator, oscillator, and various capacitors and resistors. Step-by-step inverter building instructions can guide you through assembling these components in the correct order to create a functional inverter.
Frequently Asked Questions For Where Is Inverter Located
Where Is The Inverter Located In An Rv?
The inverter in an RV is typically located in a convenient and accessible location. It is commonly found in the battery compartment or near the electrical control panel. The placement may vary depending on the RV model and design. It is important to have easy access to the inverter for maintenance and troubleshooting purposes.
Where Is My Inverter On My Trailer?
The location of the inverter on your trailer may vary depending on the make and model. However, it is commonly found in the electrical compartment or near the RV’s battery. It is important to refer to your trailer’s user manual or contact the manufacturer for precise information regarding the location of the inverter.
How Do I Turn On The Inverter In My Rv?
To turn on the inverter in your RV, follow these steps: 1. Locate the inverter in your RV. It is typically installed in a convenient and accessible location. 2. Ensure that the RV is disconnected from any external power source. 3.
Check the power switch on the inverter. It is usually located on the front or side of the unit. 4. Flip the power switch to the “On” position. 5. Once the inverter is turned on, you can start using it to power your RV appliances and devices.
Remember to monitor your RV’s battery levels while using the inverter to avoid draining the battery too much. Additionally, turn off the inverter when not in use to conserve battery power.
Where Should I Install my Inverter for Solar Panels?
When considering the installation of solar panels, one crucial aspect is the placement of the inverter. To uncover the best location for your inverter, unraveling the secrets of solar panel inverters is essential. Ensure it is installed within a short distance from the panels, protected from extreme temperatures, and easily accessible for maintenance. Investing time in understanding the functionalities will lead to optimal performance and energy efficiency.
Where Should The Inverter Be Placed?
The inverter should be placed in a suitable location that meets certain guidelines. It is important to consider factors such as accessibility, ventilation, and protection from elements when deciding where to place the inverter. Ideally, the inverter should be placed in a well-ventilated area with sufficient clearance for maintenance and airflow.
It should also be protected from direct sunlight, excessive heat, and moisture. Additionally, the inverter should be easily accessible for monitoring and troubleshooting purposes. Placing it near the battery bank and main electrical panel can help minimize power loss and reduce cable length.
Avoid placing the inverter in areas with high humidity, extreme temperatures, or excessive dust. Consulting the manufacturer’s guidelines and seeking professional advice can ensure the inverter is placed in the optimal location for efficient and safe operation.
Conclusion
The location of an inverter in your RV or camper is an important consideration for efficient and safe operation. While there is no one-size-fits-all answer to where the inverter should be located, there are some common options to consider. One option is to have the inverter installed inside the RV or camper, usually near the electrical panel or battery.
This allows for easy access and protection from the elements. However, it may take up valuable space inside and may require additional ventilation. Another option is to install the inverter outside, typically in a weatherproof compartment or cabinet. This frees up space inside the RV but may require additional wiring and protection from the elements.
Ultimately, the best location for your inverter depends on your specific RV or camper setup and personal preferences. Consulting with a professional or researching your specific make and model can help ensure you make the right decision. Remember to always follow manufacturer guidelines and consult a professional if you are unsure or need assistance with the installation.
This will help ensure the longevity and efficiency of your RV inverter system.