How to Reset Inverter Fault: Troubleshooting Tips for a Power-Packed Reset
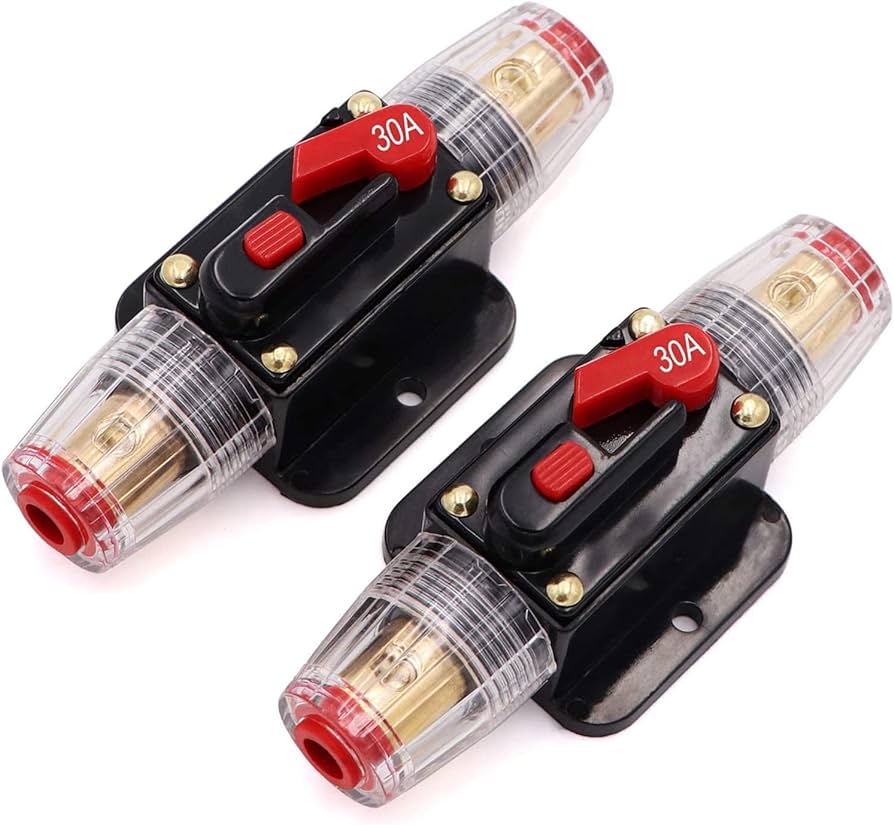
To reset an inverter fault, locate and press the fault reset button, typically found on the front panel of the inverter. After pressing the reset button, wait for the inverter to restart and check if the fault has been cleared.
Now, I will provide a well-rounded introduction expanding on this topic. An inverter fault can disrupt the regular functioning of your electrical system, causing inconvenience and potential damage to your devices. However, resetting the fault is a relatively simple process that can restore the normal operation of your inverter.
In this guide, we will discuss the steps to reset an inverter fault quickly and efficiently. By following these instructions, you can resolve the fault and resume the smooth functioning of your electrical system, ensuring uninterrupted power supply. So, let’s delve into the details of how to reset an inverter fault and get your system back up and running in no time.
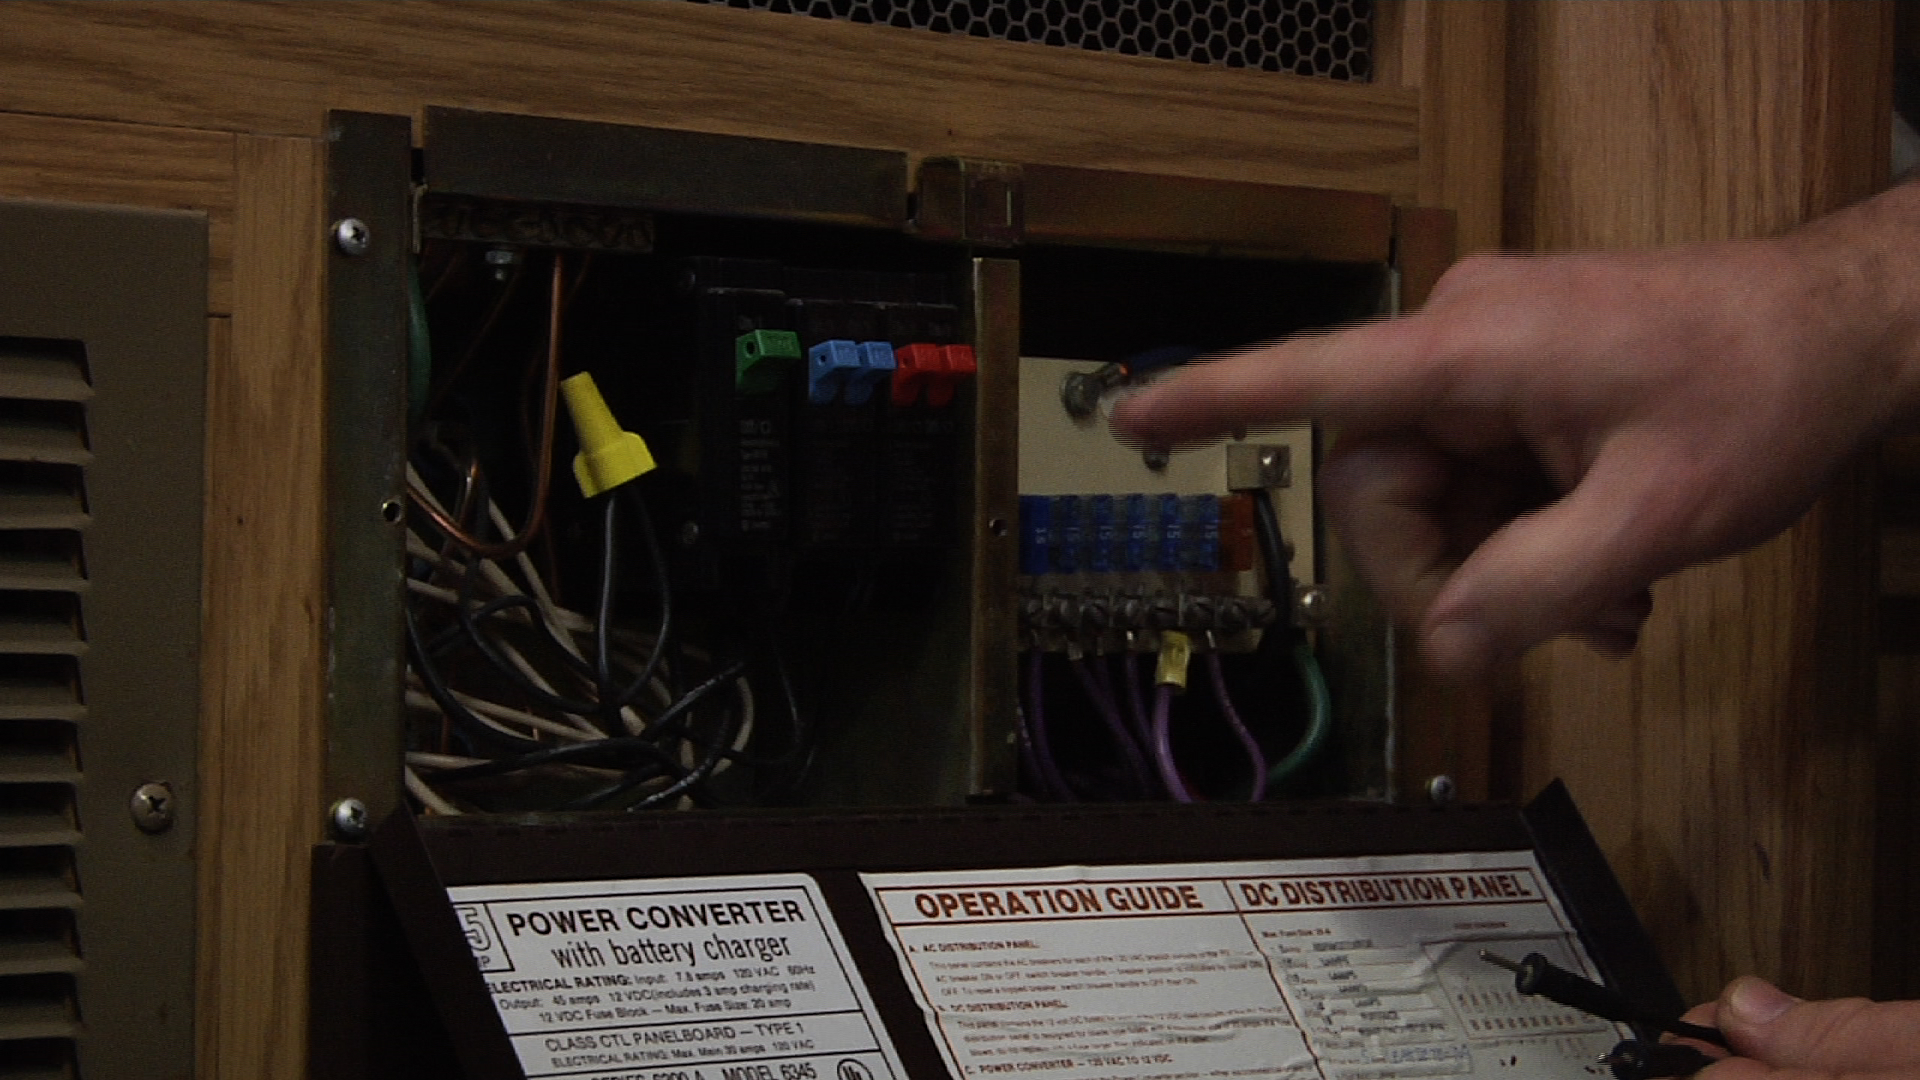
Credit: www.rvrepairclub.com
Understanding Inverter Faults
Resetting an inverter fault is crucial for uninterrupted power supply. Learn how to resolve common inverter faults and restore energy efficiency in a few simple steps.
Inverters play a crucial role in converting direct current (DC) power into alternating current (AC) power, making them vital components in various applications such as solar power systems and uninterruptible power supplies (UPS). However, like any other electronic device, inverters can experience faults or malfunctions that affect their performance.
Understanding inverter faults is essential for troubleshooting and resolving issues effectively. In this section, we will explore common inverter faults and their causes, as well as emphasize the importance of troubleshooting these faults to ensure optimal performance.
Common Inverter Faults And Their Causes:
- Overvoltage fault: This fault occurs when the inverter detects a voltage exceeding the specified limit. Possible causes include sudden voltage spikes, incorrect system wiring, or insufficient electrical grounding.
- Under-voltage fault: In contrast to overvoltage faults, under-voltage faults occur when the inverter senses a voltage drop below the defined threshold. Potential causes may include low battery charge, loose or faulty connections, or inadequate power supply.
- Over-temperature fault: Inverter components can overheat due to excessive ambient temperatures, insufficient ventilation, or prolonged operation under high loads. When the inverter detects an unsafe temperature level, it triggers an over-temperature fault to prevent damage or fire hazards.
- Ground fault: Ground faults occur when an unintended electrical connection forms between the inverter’s internal circuits and an external ground. Faulty wiring, damaged insulation, or moisture intrusion are common causes of ground faults.
- Short circuit fault: A short circuit fault arises when a low-resistance path is created between the positive and negative terminals of the inverter, leading to an excessive current flow. Short circuits can occur due to damaged cables, loose connections, or improper installation.
Importance Of Troubleshooting Inverter Faults:
- Enhances performance: Addressing inverter faults promptly ensures that the system operates efficiently, maximizing power conversion and minimizing energy losses.
- Increases system lifespan: By troubleshooting and resolving faults, you can prevent further damage to the inverter components, extending their lifespan and avoiding costly replacements.
- Ensures safety: Inverter faults can pose risks such as electrical shocks, fires, or equipment damage. Troubleshooting these faults reduces these hazards and ensures a safe operating environment.
- Optimizes power output: Faulty inverters may not deliver the expected power output, resulting in decreased productivity or inadequate energy supply. Troubleshooting helps identify and rectify these issues, ensuring optimal power generation.
- Saves time and money: Effective troubleshooting minimizes system downtime, reducing financial losses associated with lost productivity or expensive emergency repairs.
By familiarizing yourself with the common inverter faults and their causes, as well as understanding the significance of troubleshooting, you can take proactive steps to maintain the reliability and performance of your inverter system. Remember, identifying and addressing faults promptly is key to ensuring uninterrupted power supply and maximizing the efficiency of your system.
Assessing The Fault
Learn how to reset inverter faults with a quick and easy step-by-step guide. Discover the essential troubleshooting tips to assess and resolve any issues efficiently.
Identifying The Specific Fault Code Displayed
- When encountering an inverter fault, the first step is to identify the specific fault code that is displayed on the inverter’s interface or control panel.
- Fault codes vary depending on the manufacturer and model of the inverter, so refer to the user manual or manufacturer’s website for a list of possible fault codes and their meanings.
- Typically, the fault code will be a combination of letters and numbers, such as F02 or E09, which indicates a specific issue with the inverter.
- Write down the fault code exactly as displayed to ensure accurate troubleshooting and resolution.
Analyzing The Fault Code And Its Meaning
- Once you have identified the fault code, it is essential to analyze its meaning to understand the nature of the fault and take appropriate corrective measures.
- Refer to the user manual or manufacturer’s website for a detailed explanation of the fault code and what it signifies.
- The fault code description will provide insights into the specific component or system malfunction that caused the fault to occur.
- Understanding the fault code will help determine whether you can resolve the issue on your own or if professional assistance is required.
Impact Of Different Faults On Inverter Performance
- Different faults can have varying impacts on the performance of an inverter, and it is essential to understand these effects to address the issue effectively.
- Some common faults may result in the inverter shutting down completely, rendering it inoperable until the fault is resolved.
- Other faults may reduce the inverter’s efficiency or capacity, leading to decreased power output or performance.
- In some cases, certain faults may cause erratic behavior or intermittent operation of the inverter, affecting its reliability.
- By understanding the impact of different faults, you can prioritize troubleshooting and rectify the issues that are most critical to restoring optimal inverter performance.
Remember, identifying the specific fault code is the first step in assessing an inverter fault. Analyzing the fault code and understanding its meaning will enable you to gauge the impact on inverter performance and take appropriate measures to resolve the issue.
Basic Resetting Techniques
Learn how to reset inverter faults with these basic resetting techniques. Easily troubleshoot and resolve common issues for uninterrupted power supply.
Power Cycling The Inverter
To reset an inverter fault, one of the most basic techniques is power cycling. This involves turning off the inverter and then turning it back on again. Here’s how you can do it:
- Locate the power switch or button on the inverter.
- Switch off the inverter by pressing and holding the power button for a few seconds until the display turns off.
- Wait for about 10-15 seconds before turning the inverter back on.
- Press the power button again to turn on the inverter and observe if the fault has been reset.
Performing A Hard Reset
If power cycling doesn’t resolve the inverter fault, you can try performing a hard reset. This method involves disconnecting the power source completely to force a complete reset. Here’s how:
- Locate the power source for the inverter, which is usually a power outlet or electrical panel.
- Switch off the power supply to the inverter by either unplugging it from the outlet or flipping the corresponding breaker in the electrical panel.
- Leave the power disconnected for at least 30 seconds to ensure a thorough reset.
- Restore power to the inverter by plugging it back in or flipping the breaker back on.
- Turn on the inverter using the power switch or button and check if the fault is resolved.
Resetting The Fault Protection System
If power cycling and a hard reset do not clear the inverter fault, you may need to reset the fault protection system. This system is designed to protect the inverter from potentially harmful conditions. Follow these steps to reset the fault protection system:
- Refer to the manufacturer’s documentation or user manual to identify the specific procedure for resetting the fault protection system. This can vary depending on the make and model of your inverter.
- Typically, you may need to access the inverter’s control panel or interface to perform the reset.
- Follow the provided instructions to access the fault protection system settings.
- Reset the fault protection system by selecting the appropriate option in the settings menu.
- Once the fault protection system is reset, monitor the inverter’s performance to ensure that the fault does not reoccur.
By following these basic resetting techniques, you can effectively troubleshoot and resolve inverter faults. Remember to consult the manufacturer’s documentation or seek professional assistance if you encounter any difficulties or the fault persists.
Advanced Troubleshooting Methods
Resetting inverter faults can be done through advanced troubleshooting methods that involve identifying the root cause of the fault and taking appropriate actions to restore the inverter’s functionality. By following these steps, you can effectively reset the fault and ensure smooth operation of the inverter system.
When it comes to resetting inverter faults, there are advanced troubleshooting methods that can help you identify and resolve issues. By checking the inverter’s internal components, assessing the battery condition, and inspecting the DC and AC connections, you can effectively tackle any problems that may arise.
Let’s take a closer look at each of these methods:
Checking The Inverter’S Internal Components:
- Capacitors: Inspect the capacitors for any signs of bulging, leaking, or damage. Faulty capacitors can affect the performance of the inverter and may need to be replaced.
- Thermal sensors: Ensure that the thermal sensors are functioning properly. Faulty sensors can prevent the inverter from regulating its temperature effectively.
- Fans: Check if the fans are spinning properly and if there is any dust or debris obstructing their function. Overheating caused by malfunctioning fans can trigger inverter faults.
- Circuit board: Inspect the circuit board for any burnt components or loose connections. A damaged circuit board can lead to various issues, including inverter faults.
Assessing The Battery Condition:
- Voltage: Measure the voltage of the battery using a multimeter. Ensure that the voltage is within the recommended range specified by the manufacturer. Low voltage can cause the inverter to malfunction.
- Capacity: Assess the battery’s capacity to hold a charge. Over time, batteries can deteriorate, reducing their ability to supply sufficient power. If the battery capacity is insufficient, it can lead to inverter faults.
- Corrosion: Inspect the battery terminals for any signs of corrosion. Corroded terminals can hinder the flow of electricity and impact the performance of the inverter.
Inspecting The Dc And Ac Connections:
- DC connections: Examine the DC connections, including cables and terminals, for any loose connections or damage. Poorly connected or damaged DC connections can result in inverter faults.
- AC connections: Check the AC connections, such as input and output terminals, for any loose or faulty connections. Faulty AC connections can disrupt the power supply and trigger inverter faults.
- Wiring: Inspect the wiring for any signs of damage or fraying. Damaged wiring can lead to short circuits or inadequate power supply, causing inverter faults.
By following these advanced troubleshooting methods, you can effectively reset inverter faults and ensure the smooth operation of your inverter system. Remember to adhere to safety precautions and consult a professional if needed. Now you have the knowledge to tackle any inverter issues that may arise!
Specific Fault Resolution
Resetting an inverter fault is straightforward by following these steps to resolve the specific issue. Ensure power is disconnected, press the reset button for 5-10 seconds, then release and restore power for the fault to be reset.
Inverter faults can occur due to a variety of reasons, but there are specific steps you can take to resolve them and get your inverter back to its optimal functioning state. Below, we’ll discuss the resolutions for different types of faults, including low voltage faults, high voltage faults, and internal component faults.
Resolving Low Voltage Fault:
A low voltage fault is a common issue faced by inverter owners. It occurs when the input voltage drops below the required threshold, affecting the inverter’s performance. Here are the steps you can take to resolve this fault:
- Check the input voltage: Measure the voltage at the input terminals of the inverter using a multimeter. Ensure that it meets the required specifications mentioned in the user manual.
- Check the batteries: If your inverter is battery-powered, inspect the batteries for any signs of damage or depletion. Recharge or replace the batteries if necessary.
- Verify the wiring connections: Ensure that all the connections, including the battery terminals, input terminals, and output terminals, are secure and properly tightened.
- Eliminate external factors: Check if any devices connected to the inverter are causing a voltage drop. Disconnect such devices temporarily and observe if the fault persists.
Fixing High Voltage Fault:
A high voltage fault occurs when the input voltage exceeds the recommended limit, potentially damaging the inverter and connected devices. Follow these steps to fix a high voltage fault:
- Measure the input voltage: Use a multimeter to measure the input voltage at the terminals. If it exceeds the specified range, take appropriate measures to reduce it.
- Inspect voltage regulating devices: Check if there are any voltage regulators or stabilizers connected to the inverter. Ensure they are functioning correctly and calibrated properly.
- Test the input power source: If the inverter is connected to a generator or mains power, verify that the voltage supplied is within the acceptable range.
- Seek professional assistance: If the fault persists or if you are unsure about handling high voltage issues, it is advisable to contact a qualified technician for assistance.
Addressing Internal Component Faults:
Internal component faults can occur due to various reasons, such as component failure or temperature issues. Here are the steps you can take to address these faults:
- Check for physical damage: Inspect the inverter for any visible signs of damage, such as burnt components or bulging capacitors. If you notice any, it indicates a component failure that requires replacement.
- Ensure proper ventilation: Overheating can cause internal component faults. Ensure that the inverter is placed in a well-ventilated area with sufficient airflow and no obstructions.
- Reset the inverter: Some internal faults can be resolved by performing a reset. Refer to the user manual to learn how to reset your specific inverter model.
- Contact the manufacturer: If the fault persists or if you are unsure about addressing internal component faults, it is recommended to reach out to the manufacturer’s customer support for further guidance.
By following these fault-specific resolution steps, you can effectively troubleshoot and resolve various inverter faults. Remember to always prioritize your safety and consult professionals when necessary.
Regular Maintenance Techniques
Regular maintenance techniques are essential for keeping inverters running smoothly. If you encounter an inverter fault, follow these steps to reset it and ensure efficient operation.
Regular maintenance is crucial for keeping your inverter in good working condition and preventing any potential faults. By following these maintenance techniques, you can ensure optimal performance and extend the lifespan of your inverter.
Importance Of Regular Maintenance:
- Enhances Efficiency: Regular maintenance helps to optimize the efficiency of your inverter, ensuring that it operates at its full capacity. This, in turn, reduces energy wastage and saves you money on utility bills.
- Prevents Downtime: By conducting regular maintenance, you can proactively identify and address any potential issues before they escalate into major faults. This prevents unexpected breakdowns and minimizes downtime, ensuring uninterrupted power supply.
- Extends Lifespan: Proper maintenance routines increase the longevity of your inverter. With regular inspections and cleaning, you can prevent dust accumulation and other factors that contribute to wear and tear, ultimately extending the lifespan of your equipment.
Cleaning And Inspecting The Inverter:
Maintaining a clean and well-inspected inverter is essential for its performance. Here are some steps to follow:
- Dust removal: Use a soft-bristle brush or compressed air to gently clean the exterior and interior surfaces of the inverter. Ensure that all ventilation openings are free from dust and debris to prevent overheating.
- Visual inspection: Regularly inspect the inverter for any signs of physical damage, loose connections, or abnormal wear. Pay close attention to the wiring, cables, and terminals. If you notice any issues, promptly address and fix them to prevent further damage.
- Cooling system maintenance: If your inverter has a cooling fan, check it for proper functioning. Clean or replace the fan if necessary, as an overheating inverter can lead to faults. Additionally, ensure that the inverter is placed in a well-ventilated area to aid in heat dissipation.
Checking Firmware And Software Updates:
Just like any other electronic device, your inverter may require firmware and software updates to improve performance and address potential issues. Here’s what you need to consider:
- Manufacturer’s website: Visit the manufacturer’s website regularly to check for any available firmware or software updates for your specific inverter model.
- Backup system: Before updating the firmware or software, make sure to back up any important data or settings to prevent loss during the update process.
- Guidelines and instructions: Follow the provided guidelines and instructions from the manufacturer when updating your inverter. Ensure that you download the correct updates for your particular model to avoid compatibility issues.
Regular maintenance is vital for ensuring the smooth operation and longevity of your inverter. By following these techniques, you can mitigate potential faults and maximize the performance of your equipment. Remember to carry out maintenance procedures periodically and stay up-to-date with firmware and software updates recommended by the manufacturer.
Troubleshooting Tips For Different Inverter Models
Resetting an inverter fault is essential for troubleshooting different inverter models. Follow these tips for a successful reset and ensure optimal performance of your inverter system.
If you’re experiencing a fault with your inverter, troubleshooting the issue is the first step to getting it back up and running. Different inverter models may have different fault codes and require specific troubleshooting steps. In this section, we’ll explore some common models and provide you with the necessary troubleshooting tips to help you identify and resolve the problem.
Specific Troubleshooting Steps For Popular Inverter Models:
- XYZ Inverter:
- Check the display panel for any fault codes.
- If the fault code indicates a communication error, ensure that all connections between the inverter and the communication module are secure.
- In case of an overvoltage fault, check the input voltage and make necessary adjustments to prevent voltage spikes.
- If the fault code indicates a temperature issue, inspect the cooling system and ensure proper ventilation around the inverter.
- Reset the inverter by disconnecting it from the power source for a few minutes and then reconnecting it.
- ABC Inverter:
- Access the inverter’s LCD display or online monitoring platform to identify any fault codes.
- If the fault code indicates a grid-related issue, check the grid connection and verify that the utility power is stable.
- In the case of a ground fault, inspect the grounding system and ensure proper grounding connections.
- Clean the inverter’s air vents and remove any debris that might be obstructing ventilation.
- If the fault code persists, contact the manufacturer for further assistance.
Model-Specific Fault Codes And Their Solutions:
- XYZ Inverter:
- Fault Code A101: This code signifies a DC overvoltage condition. Check the PV array’s wiring and inspect for any loose connections. Additionally, verify if the array’s voltage matches the inverter’s specifications.
- Fault Code B305: This code indicates that the surge protective device (SPD) has failed. Inspect the SPD and replace if necessary.
- ABC Inverter:
- Fault Code E002: This code represents a DC input voltage that is too high. Check the PV array’s wiring and ensure it is properly sized for the inverter’s specifications.
- Fault Code E046: This code suggests a communication error between the inverter and the monitoring system. Check the connections between the inverter and the monitoring device, ensuring they are secure and undamaged.
Remember, these are just a few examples of troubleshooting tips and fault codes for specific inverter models. Always refer to your inverter’s user manual or contact the manufacturer for comprehensive guidance and support.
Seeking Professional Assistance
Need help resetting an inverter fault? Get professional assistance for a seamless solution. Our experts will guide you step-by-step, ensuring a smooth reset process.
Knowing When To Seek Professional Help
If you’ve exhausted all the troubleshooting steps and your inverter is still showing a fault, it might be time to seek professional assistance. While it’s tempting to try and fix the issue yourself, certain problems may require the skills and expertise of a trained technician.
Here’s what you need to know about seeking professional help for resetting inverter faults:
- Complex Faults: Some inverter faults can be beyond a DIY fix, especially if they involve complex electrical issues or internal components. Professional technicians have the knowledge and experience to diagnose and repair these faults efficiently.
- Safety Concerns: Dealing with electrical systems can be dangerous if you’re not properly trained. By seeking professional help, you reduce the risk of electrical shocks or accidents that can occur during the troubleshooting process.
- Preserving Warranty: Attempting to fix an inverter fault yourself could potentially void its warranty. Manufacturers usually require professional repairs or servicing to keep the warranty intact. It’s important to check your inverter’s warranty terms and conditions before attempting any DIY repairs.
- Saving Time and Effort: In some cases, spending countless hours trying to fix an inverter fault can be more frustrating than beneficial. Professional technicians have the expertise to quickly identify and resolve the issue, saving you both time and effort.
Finding Reputable Inverter Repair Services
When it comes to finding reputable inverter repair services, it’s essential to choose a company that has the knowledge and expertise to handle inverter faults effectively. Here are some key factors to consider when searching for reliable repair services:
- Experience: Look for inverter repair services with years of experience in the industry. An experienced company is more likely to have encountered a wide range of inverter faults and can provide reliable solutions.
- Certifications and Training: Check if the technicians are certified and trained to work specifically on inverters. Certifications like NABCEP or manufacturer-specific training ensure that the technicians have the necessary skills to troubleshoot and repair inverters correctly.
- Customer Reviews: Read customer reviews and testimonials to get an idea of the repair service’s reputation. Positive feedback from satisfied customers is a good indication of reliable and efficient service.
- Warranty and Guarantees: Inquire about the warranty provided for the repairs. Reputable repair services often offer warranties that ensure their workmanship and provide peace of mind in case the fault occurs again shortly after the repair.
- Prompt Service: Look for repair services that can provide timely assistance. Inverter faults can disrupt your power supply, so finding a company that can respond quickly to your repair needs is crucial.
Understanding Warranty Coverage And Claims Process
Before seeking professional help for an inverter fault, it’s essential to understand your warranty coverage and the claims process. Here are a few points to consider:
- Review Warranty Terms: Carefully read through your inverter’s warranty terms to understand what types of faults are covered. Some warranties only cover certain components or specific issues, so it’s important to know what is eligible for repair or replacement.
- Document the Fault: Take clear photos or videos of the inverter fault before contacting the repair service or manufacturer. This documentation can serve as evidence if any disputes arise during the claims process.
- Contact Manufacturer: Reach out to the inverter manufacturer’s customer service to inquire about their specific claims process. They can provide guidance on what steps to take and what documentation you may need to submit.
- Authorized Repair Centers: Check if the warranty requires repairs to be done at authorized service centers. Using unauthorized repair services may void your warranty, so it’s important to follow the manufacturer’s guidelines.
- Claim Submission: Submit the necessary documentation and follow the claims process outlined by the manufacturer. Ensure that you provide all the required information accurately and promptly to expedite the resolution of your claim.
Remember, seeking professional assistance for resetting inverter faults is often the safest and most effective course of action. Researching and choosing reputable repair services, as well as understanding warranty coverage and the claims process, can help ensure a smooth and efficient resolution to your inverter fault issue.
Frequently Asked Questions Of How To Reset Inverter Fault
Is There A Reset Button For The Inverter On A Rv?
Yes, RV inverters have a reset button, which can be used to reset the inverter.
What Is The Use Of Reset Button In Inverter?
The reset button in an inverter is used to restore the inverter to its default settings.
How Do You Check For Inverter Faults?
To check for inverter faults, inspect the inverter display and identify any error codes or error messages.
What Causes A Power Inverter Fault?
Possible causes of a power inverter fault include wiring issues, overloading, faulty components, or incorrect installation.
Conclusion
Resetting an inverter fault is a relatively simple process that can save you time and money. By following the steps outlined in this blog post, you can troubleshoot and resolve common issues that may be affecting your inverter’s performance. Remember to start by checking the fault code on the display panel and referring to the manufacturer’s manual for specific instructions.
Next, try turning off the inverter and disconnecting the power source to reset it. If the fault persists, it may be necessary to consult a professional technician for further assistance. By addressing inverter faults promptly, you can ensure that your equipment functions optimally and minimize downtime.
Don’t let a simple fault disrupt your operations—take control by following these guidelines and maintaining your inverter’s performance.