How to Make Inverter: A Step-by-Step Guide
To make an inverter, you can use a single 4060 IC, a transformer, and power transistors from your electronic junk box. This simple power inverter circuit can be created using these components.
Creating your own inverter can be a cost-effective solution for generating AC power from DC sources. Whether you want to have backup power during a blackout or power your electronic devices while camping, knowing how to make an inverter can come in handy.
We will explore a simple yet effective design using a 4060 IC, a transformer, and power transistors. By following the steps outlined below, you’ll be able to build your own inverter and enjoy the benefits of AC power wherever you go. So, let’s dive in and learn how to make an inverter from scratch.
Credit: www.electronicsandyou.com
Planning And Preparing
Learn how to make an inverter at home with a simple step-by-step circuit. By using common electronic components like a 4060 IC, a transformer, and power transistors, you can create your own power inverter without much hassle. It’s a cost-effective solution for converting DC power into AC power.
Choosing The Right Inverter Type
When it comes to making an inverter, choosing the right type is crucial. Here are some options you can consider:
- Modified Sine Wave Inverter: This type of inverter is affordable and can power most basic electrical devices. However, it might not be suitable for sensitive electronics like laptops or medical equipment.
- Pure Sine Wave Inverter: If you want to power sensitive electronics, a pure sine wave inverter is the way to go. Although it might be a bit more expensive, it provides a clean and stable waveform that is similar to the power grid.
- Grid Tie Inverter: If you want to generate your own electricity using renewable sources like solar panels, a grid tie inverter is necessary. It allows you to feed excess power back into the grid and even earn credits or reduce your electricity bills.
Understanding Power Requirements
Before diving into making an inverter, it’s essential to understand your power requirements. Consider the following factors:
- Load Wattage: Determine the total wattage of all the devices you want to power simultaneously. This will help you choose the right inverter size and prevent overloading.
- Peak Power: Some devices, like refrigerators or air conditioners, require higher power during startup. Take into account the peak power requirements to ensure your inverter can handle the initial surge.
- Battery Capacity: The inverter relies on the battery to supply power. Calculate the battery capacity needed based on your expected runtime and power consumption.
Gathering The Necessary Materials And Tools
To successfully build an inverter, gather the following materials and tools:
- Transformer: Choose a transformer suitable for your desired power output. Make sure it can handle the voltage and current requirements of your inverter.
- Transistors: Select transistors that can handle the power load and frequency of your inverter. MOSFETs are commonly used for higher power applications.
- Diodes: Use diodes to rectify the AC output from the transformer into DC power.
- Capacitors: Capacitors help stabilize the voltage and minimize ripple in the output waveform.
- Resistors: Determine the appropriate resistors based on the specifications of your circuit.
- Printed Circuit Board (PCB): Use a PCB to mount and connect all the electronic components.
- Soldering Iron and Solder: These tools are necessary for soldering the components onto the PCB.
- Multimeter: A multimeter is crucial for testing and troubleshooting your inverter.
- Safety Gear: Don’t forget to wear safety gear like gloves and safety glasses to protect yourself during the construction process.
By carefully planning and preparing your inverter project, you’ll be well on your way to successfully building your own inverter. Choose the right inverter type, understand your power requirements, and gather all the necessary materials and tools. With these steps completed, you’ll be ready to move on to the next phase of building your inverter.
Building The Circuit
If you’re wondering how to make an inverter, it’s actually quite simple. With just a few components like a 4060 IC, a transformer, and power transistors, you can create your own power inverter circuit. It’s an easy and cost-effective way to convert DC power to AC power for various applications.
Building the inverter circuit is a crucial step in creating your own inverter. Here, we will guide you through the process of creating the inverter circuit diagram, soldering components onto the circuit board, and making connections for input and output.
Creating The Inverter Circuit Diagram
To start building the inverter, you will first need to create a circuit diagram. This diagram will serve as a blueprint for your inverter’s circuitry. Follow these steps to create an effective circuit diagram:
- Determine the required power output: Before creating the circuit diagram, determine the desired power output of your inverter. This will help you determine the appropriate components and ensure the circuit can handle the load.
- Identify the components: Identify all the necessary components for your inverter, such as transistors, resistors, capacitors, and diodes. Make sure to choose components that can handle the desired power output.
- Design the circuit layout: Sketch out the circuit layout, indicating the placement of each component and the connections between them. This will help you visualize the circuit before soldering.
- Add labels and annotations: Label each component and connection on your circuit diagram to ensure clarity and ease of assembly.
- Test the circuit design: Before moving on to soldering, double-check your circuit diagram for any errors or improvements. It’s essential to test the circuit design to ensure it functions as intended.
Soldering Components Onto The Circuit Board
Once you have the circuit diagram ready, it’s time to solder the components onto the circuit board. Follow these steps for successful soldering:
- Gather the necessary tools and equipment: Gather a soldering iron, solder wire, flux, a desoldering pump (optional), and a soldering stand. These tools are essential for proper soldering.
- Prepare the circuit board: Ensure that the circuit board is clean and free of any dirt or debris. You can use a PCB cleaner or isopropyl alcohol to clean the board. Also, make sure the board is securely placed on a steady surface.
- Apply flux: Apply a small amount of flux to the solder pads on the circuit board. Flux helps in soldering by improving heat transfer and removing oxidation from the surfaces.
- Solder the components: Heat up the soldering iron and begin soldering the components onto the circuit board. Start with smaller components first and gradually move on to larger ones. Use the appropriate amount of solder to form proper and secure connections.
- Inspect and clean: After soldering each component, inspect the joints for any defects such as cold joints or excess solder. Use a desoldering pump if necessary to fix any mistakes. Finally, clean the board to remove any flux residue.
Making Connections For Input And Output
With the components soldered onto the circuit board, it’s time to make the necessary connections for input and output. Follow these steps:
- Connect the power source: Identify the input terminals on the circuit board and connect the power source, such as a battery or DC power supply, to these terminals. Ensure proper polarity is maintained.
- Connect the output load: Identify the output terminals on the circuit board and connect the load, such as an AC appliance or device, to these terminals. Pay attention to the load’s power requirements and ensure the circuit can handle the load.
- Secure the connections: Use appropriate connectors or terminal blocks to secure the input and output connections. This will ensure safe and reliable operation.
- Test the inverter: Before finalizing the connections, test the inverter by powering it up and checking if it functions as intended. Use a multimeter to measure the output voltage and frequency.
By following these instructions, you can successfully build the circuit for your inverter. Once the circuit is complete, you can move on to testing and fine-tuning the inverter’s performance. Remember to prioritize safety and double-check your work at each step of the process.
Testing And Troubleshooting
Learn how to make an inverter at home with a simple circuit and step-by-step instructions. No need for complicated equipment – all you need are a few components like a transformer and power transistors. Create your own power inverter easily and efficiently.
Powering Up The Inverter
When it comes to testing and troubleshooting an inverter, there are a few important steps to follow. Let’s take a look at how to power up the inverter and ensure it is working properly:
- Connect the inverter to a power source: Use the appropriate cables to connect the inverter to a 12V DC power source, such as a battery.
- Turn on the inverter: Locate the power switch on the inverter and turn it on. You may also need to activate any safety switches or buttons, depending on the model.
- Check the LED indicators: Most inverters have LED indicators that provide information about the status of the inverter. Look for indicators that show the power is on and any error codes or warnings that may indicate a problem.
Checking For Output Voltage
Once the inverter is powered up, it’s important to verify that it is producing the correct output voltage. Here’s how to check for output voltage:
- Set up a test load: Connect a device or load that requires the same voltage as the output of the inverter. For example, if the inverter is designed to provide 220V AC power, connect a device that operates at 220V AC.
- Measure the output voltage: Use a multimeter or voltage tester to measure the voltage at the output terminals of the inverter. Ensure that the measured voltage matches the expected output voltage of the inverter.
Identifying And Fixing Common Issues
In some cases, you may encounter issues with your inverter. Here are some common problems and their potential solutions:
- No output voltage: If the inverter is not producing any output voltage, check the power source connection, the input voltage, and any fuses or circuit breakers that may be tripped. Also, ensure that the inverter is compatible with the load you are trying to power.
- Low output voltage: If the output voltage is lower than expected, check the input voltage and the load connected to the inverter. Make sure the load is compatible with the inverter’s specifications and that the input voltage is within the acceptable range.
- Overheating: If the inverter becomes too hot during operation, it may shut down to protect itself. Check for proper ventilation and ensure that the inverter is not overloaded.
- Noise or interference: If you hear excessive noise or notice interference on connected devices, check the grounding of the inverter and the quality of the DC power source.
Remember, troubleshooting and fixing inverter issues may require technical knowledge and expertise. If you are unsure or unable to resolve the issue, it is best to consult a professional. Inverter repair should only be attempted by qualified individuals to avoid further damage or personal injury.
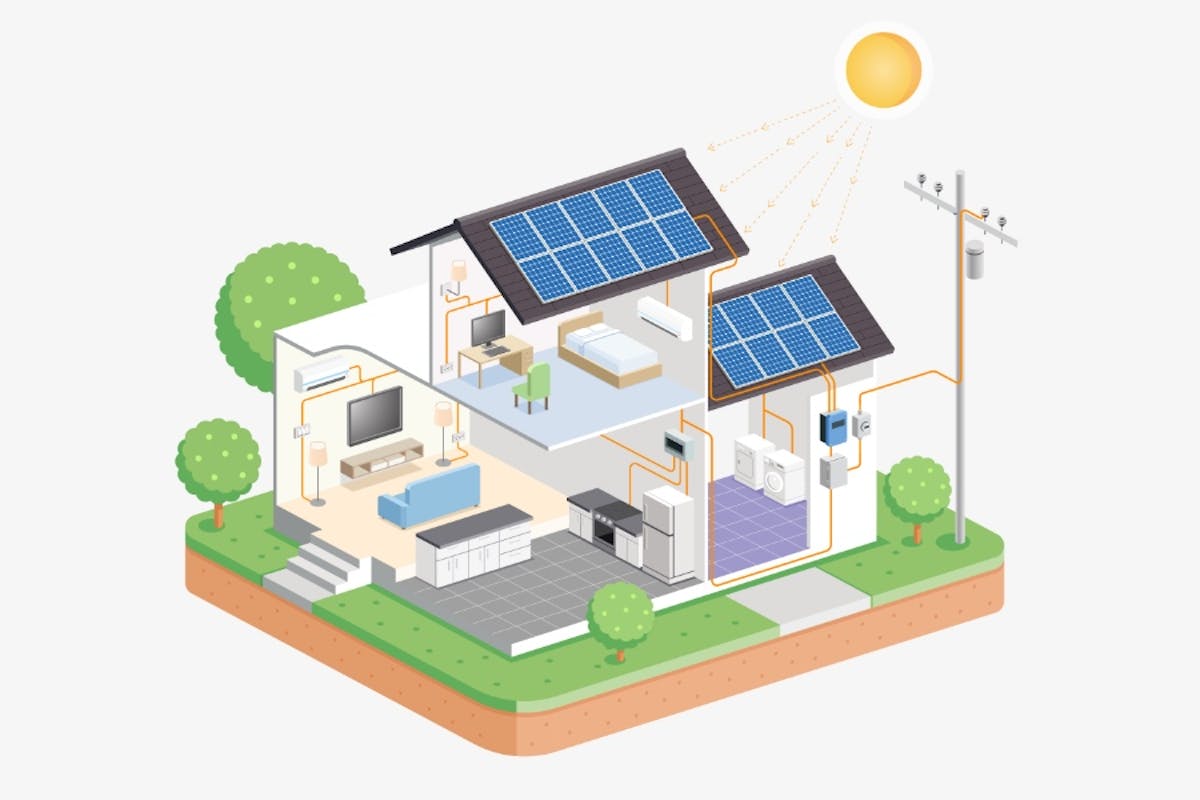
Can I Use a Homemade Inverter Instead of a Solar Inverter?
A homemade inverter is not a substitute for a solar inverter. While both convert direct current (DC) to alternating current (AC), they operate differently. Solar inverters are equipped to handle the intermittent power supply from solar panels and provide grid-compatible AC power. Understanding how solar inverters work ensures a more efficient and reliable solar energy system.
Frequently Asked Questions On How To Make Inverter
Can I Make My Own Inverter?
Yes, you can make your own inverter using components like a 4060 IC, transformer, and power transistors. The basic design of the inverter circuit involves connecting these components in a specific configuration. By doing so, you can convert DC power from a battery into AC power, suitable for powering various electronic devices.
Building your own inverter can be a cost-effective option if you have the necessary components and knowledge of circuitry. However, it’s important to note that designing and building a reliable and safe inverter requires skill and expertise. Therefore, it is recommended to follow proper guidelines and consult with experts or refer to reliable sources for detailed instructions and circuit diagrams.
How To Make A Manual Inverter?
To make a manual inverter, you can use a single 4060 IC along with a transformer and a few power transistors. This simple power inverter circuit can be created using these components. The basic design of the circuit involves connecting the 4060 IC to the power transistors and the transformer.
The 4060 IC acts as the oscillator and frequency divider, while the power transistors amplify the signal and the transformer steps up the voltage. This setup allows you to convert a DC power source into AC power, enabling you to use AC-powered devices.
By following the circuit diagram and connecting the components correctly, you can create your own manual inverter. It’s important to note that building an inverter requires a good understanding of electronics and electrical components.
What Are The Materials Required For Making Inverter?
To make an inverter, you will need a few materials. These include a transformer, power transistors, and a single 4060 IC. With these components, you can create a simple power inverter circuit. The basic design of the circuit involves connecting the IC 4060 to the transformer and power transistors.
This will allow the circuit to convert DC power to AC power. By following the proper wiring and connections, you can build your own inverter. It’s a great DIY project for those interested in electronics.
Can You Build An Inverter Without A Transformer?
Yes, it is possible to build an inverter without a transformer. By using an IC 4060, power transistors, and a few other components, you can create a simple power inverter circuit. The basic design of the circuit involves converting DC power to AC power without the need for a transformer.
This can be a cost-effective solution for small-scale applications.
Conclusion
To sum up, making your own inverter can be a rewarding and cost-effective project. By following the step-by-step instructions and using the right components, you can create a functional power inverter right at home. Whether you need it for backup power during emergencies or for powering AC appliances while camping, building your own inverter allows you to have control over the specifications and customization.
Additionally, it’s a great way to learn about electronics and expand your DIY skills. Remember to prioritize safety throughout the process, including proper insulation and handling of high-voltage components. With the right knowledge and precautions, you can successfully build your own inverter and have a reliable source of AC power whenever you need it.
So get started on your DIY project and enjoy the benefits of having a homemade inverter at your disposal.