How to Make a Powerful Power Inverter: A Step-by-Step Guide
To make a power inverter, you will need to gather the necessary components and follow a step-by-step process. A power inverter is a device that converts direct current (DC) electricity into alternating current (AC) electricity, allowing you to use AC-powered appliances and devices when you only have access to DC power sources, such as batteries or solar panels.
Whether you are in an off-grid location, experiencing a power outage, or simply want to be prepared for emergencies, having a power inverter can be highly beneficial. While there are pre-made power inverters available in the market, you also have the option to make one yourself.
We will guide you through the process of creating a power inverter by outlining the required components and providing step-by-step instructions. So, let’s get started on building your very own power inverter!
Understanding Power Inverters: A Brief Overview
Power inverters are essential devices that allow you to convert DC power from a battery to AC power for running electronic devices. This brief overview provides insight into how to make a power inverter and understand its functions.
Power inverters play a crucial role in converting direct current (DC) into alternating current (AC) electricity. Whether you want to run appliances in your car, charge your devices in remote areas, or provide backup power during outages, understanding power inverters is essential.
Let’s explore the different types of power inverters, their importance, and various applications.
What Are Power Inverters?
Power inverters are electronic devices that convert DC power, typically from a battery or solar panel, into AC power that can be used to run household appliances, electronics, and other devices. They function by reversing the direction of the electrical current, producing a waveform similar to the utility grid’s AC power supply.
Key points:
- Power inverters convert DC into AC power.
- They reverse the direction of electrical current.
- They generate a waveform similar to utility grid power.
Different Types Of Power Inverters
Power inverters come in various types, each designed for specific applications and power requirements. Here are the common types of power inverters:
- Modified Sine Wave Inverters:
- Provides a cost-effective solution for powering basic electronics and appliances.
- Generates a stepped approximation of a sine wave, suitable for most devices but may cause issues with sensitive equipment.
- Examples: Laptops, small kitchen appliances, power tools.
- Pure Sine Wave Inverters:
- Offers a reliable and clean power source compatible with all types of devices.
- Produces a smooth waveform identical to the utility grid’s power supply.
- Ideal for sensitive electronics, medical equipment, and devices with motors.
- Grid-Tie Inverters:
- Connects solar panels or wind turbines directly to the utility grid.
- Converts DC power generated by renewable sources into AC power for direct consumption or sale back to the grid.
- Requires proper installation and synchronization with the utility grid.
- Multi-Mode or Hybrid Inverters:
- Combines the capabilities of a grid-tie inverter and a battery backup system.
- Allows the utilization of renewable energy sources while providing backup power during outages.
- Supports both grid-connected and off-grid systems.
Importance And Applications Of Power Inverters
Power inverters have significant importance and a wide range of applications, making them essential in various scenarios:
- Remote Power Supply:
- Enables the use of electronic devices and appliances in remote areas without access to the utility grid.
- Used in RVs, boats, campsites, and off-grid homes.
- Powers devices like TVs, refrigerators, laptops, and lighting systems.
- Emergency Backup Power:
- Provides backup power during blackouts or power outages.
- Ensures continued operation of critical equipment, medical devices, and home essentials like refrigeration and heating systems.
- Renewable Energy Integration:
- Facilitates the integration of renewable energy sources like solar panels and wind turbines into the existing electrical grid.
- Converts DC power from solar or wind into AC power that can be used to power homes or sent back to the grid for credit or revenue.
- Mobile Charging:
- Allows charging of electronic devices, such as smartphones, tablets, and laptops, while on the go.
- Ideal for long road trips, camping, or working from remote locations.
By understanding the concept of power inverters, the different types available, and their applications, you can make informed decisions when it comes to choosing the right power inverter for your specific needs.

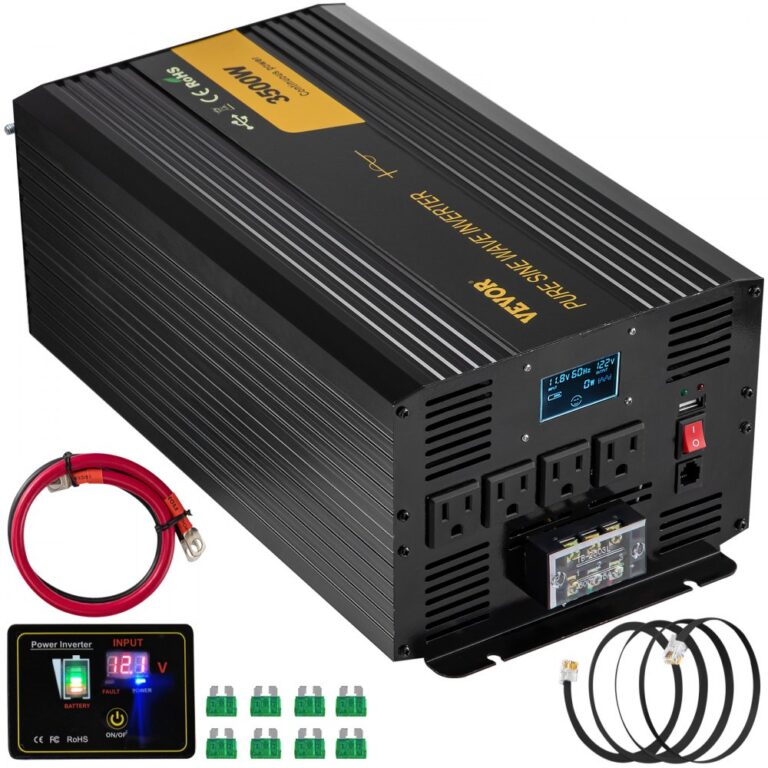
Credit: www.amazon.com
Choosing The Right Components For A Powerful Power Inverter
Choosing the right components is crucial when making a powerful power inverter. Find the most suitable parts to ensure optimal performance and efficiency in your DIY project.
Selecting The Ideal Battery For Your Power Inverter:
- Consider the battery capacity: Determine the amount of power you need to run your desired devices or appliances. Ensure that the selected battery can supply sufficient power to meet your requirements.
- Look for a deep cycle battery: Deep cycle batteries are specifically designed to provide a steady amount of power over an extended period. They are perfect for power inverters as they can handle frequent discharging and recharging without losing efficiency.
- Check the battery voltage: Power inverters are typically available in 12V, 24V, or 48V models. Choose a battery with a matching voltage rating to ensure compatibility with your power inverter.
- Evaluate the battery’s lifespan: Consider the battery’s expected lifespan and durability. Opt for a high-quality battery with a longer life to minimize the need for frequent replacements.
- Consider the battery size and weight: Depending on your space limitations and portability needs, choose a battery size and weight that best suits your requirements.
- Take into account charging options: Some batteries can be charged using multiple methods, such as solar panels, AC chargers, or alternators. Consider your charging options and select a battery that aligns with your preferred charging method.
- Ensure safety features: Look for batteries with built-in safety features such as overcharge protection, short-circuit protection, and temperature regulation to prevent any potential hazards.
Determining The Appropriate Power Inverter Size:
- Assess your power needs: Calculate the total power consumption of your devices or appliances that you plan to run with the power inverter. This will help you determine the appropriate power rating (wattage) for your inverter.
- Consider surge power requirements: Some devices, especially those with motors or compressors, require a higher initial surge of power to start. Take this surge power requirement into account when selecting the power inverter size.
- Allow for potential future expansions: If you anticipate adding more devices or appliances in the future, consider selecting a power inverter with a higher power rating to accommodate any additional power needs.
- Keep efficiency in mind: Higher efficiency power inverters not only convert DC power to AC power more effectively but also reduce the load on your battery, resulting in longer battery life.
- Consider the inverter’s waveform: Depending on your devices’ sensitivity, choose between a pure sine wave or a modified sine wave inverter. Most devices can run on a modified sine wave inverter, but sensitive electronics may require a pure sine wave inverter to operate optimally.
- Evaluate the inverter’s features: Look for additional features such as overload protection, low battery warning, and automatic shutdown to ensure the safety and longevity of both the inverter and connected devices.
- Factor in the inverter’s size and installation requirements: Consider the physical dimensions and installation requirements of the power inverter, such as available space and ventilation, to ensure a proper fit in your desired location.
Choosing The Right Electrical Components For Efficiency:
- Select appropriate gauge wire: Use the correct gauge wire for the connection between the battery, power inverter, and devices/appliances. Improper wire gauge can result in power loss and reduced efficiency.
- Install a fuse or circuit breaker: Include a fuse or circuit breaker as a safety measure to protect your power inverter and connected devices from power surges and overloads.
- Use high-quality connectors: Ensure that you use reliable and sturdy connectors to establish secure connections between the components. Loose or unreliable connections can lead to power loss and potential hazards.
- Consider a remote switch or control panel: A remote switch or control panel allows you to conveniently control the power inverter from a distance, providing ease of use and accessibility.
- Implement efficient cooling mechanisms: Power inverters generate heat during operation, and excessive heat can reduce efficiency. Consider installing cooling fans or ensuring proper ventilation to maintain optimal performance.
- Avoid excessive cable lengths: Minimize the length of the cables connecting the battery, power inverter, and devices/appliances to reduce voltage drop and increase efficiency.
- Consult the manufacturer’s recommendations: Manufacturers often provide specific recommendations for compatible electrical components. Always refer to their guidelines to ensure compatibility and maximize efficiency.
Step-By-Step Guide To Making A Powerful Power Inverter
Learn how to make a powerful power inverter with this step-by-step guide. This comprehensive tutorial will provide you with the necessary instructions and tips to successfully create your own power inverter.
Gathering the necessary tools and materials:
- To get started on creating your powerful power inverter, you’ll need a few tools and materials. Here’s a list of what you’ll require:
- Soldering iron and solder wire: These tools are necessary for connecting the various electronic components together.
- Wire strippers: A handy tool for removing the insulation from the wires.
- Multimeter: Essential for measuring voltage, current, and resistance during testing and troubleshooting.
- Circuit board: Choose a suitable circuit board to mount the components.
- Resistors, capacitors, and diodes: These electronic components are key to building the power inverter circuit.
- Transistors or MOSFETs: These components regulate the flow of electricity in the circuit.
- Battery and battery holder: The power inverter needs a reliable power source, and a battery serves this purpose.
- Enclosure: Select an appropriate enclosure to house and protect the power inverter circuit.
Materials needed for the project:
- In addition to the tools mentioned above, you’ll need the following materials:
- Wires: Different gauge wires are required to connect the components.
- Heat shrink tubes: These tubes provide insulation and protection for the soldered connections.
- Terminal blocks: Used for convenient and secure wire connections.
- Power switch: A switch to control the power input and output of the inverter.
- Cooling fan: If you plan on using the power inverter for extended periods, a cooling fan will help dissipate heat.
Building the power inverter circuit:
Understanding the circuit diagram:
- Before you begin soldering the components together, it’s crucial to have a clear understanding of the circuit diagram. The diagram illustrates how the various components connect and work together to convert DC power into AC power.
Soldering the components together:
- Once you’ve grasped the circuit diagram, it’s time to solder the components together. Follow these steps:
- Place the components on the circuit board, ensuring they align with the corresponding pins or areas.
- Strip the wires and twist them around the component pins.
- Apply heat with a soldering iron to melt the solder wire, securing the components and wires together.
Testing the circuit for functionality:
- After soldering the components, it’s essential to test the circuit for functionality. Here’s what you should do:
- Use a multimeter to measure the voltage and current at different points in the circuit.
- Verify that the components are functioning correctly and there are no short circuits or loose connections.
Assembling the power inverter:
Connecting the circuit to the battery:
- With the circuit tested and functional, it’s time to connect it to the power source. Follow these steps:
- Connect the positive and negative terminals of the battery to the respective input terminals on the circuit board.
- Double-check the connections to ensure they’re secure and proper polarity is maintained.
Wiring the input and output connections:
- After connecting the battery, it’s important to wire the input and output connections properly. Here’s what you need to do:
- Connect the input terminals to the power source that you want to convert. Ensure the polarity is correct.
- Connect the output terminals to the devices or appliances that you want to power using the inverter.
Securing the components in a suitable enclosure:
- Once all the connections are in place, it’s time to secure the components in an enclosure. Follow these steps:
- Place the circuit board and other components inside the enclosure.
- Fasten the circuit board using screws or mounting brackets.
- Ensure proper airflow and ventilation for heat dissipation by positioning the cooling fan appropriately.
Testing and Troubleshooting:
Checking the power output and waveform:
- To ensure the power inverter is functioning correctly, you need to check the power output and waveform. Perform the following steps:
- Connect a device or appliance to the power inverter output.
- Measure the voltage and current using a multimeter.
- Analyze the waveform using an oscilloscope to ensure it matches the desired AC waveform.
Addressing common issues and potential solutions:
- In case of any issues or malfunctioning, here are a few common problems and their potential solutions:
- The circuit is not functioning at all:
- Check for loose connections or short circuits.
- Verify that the correct values of resistors and capacitors are used.
- The output waveform is distorted:
- Check for faulty components, such as capacitors or diodes.
- Ensure proper grounding of the circuit.
Enhancing Power Inverter Performance:
Implementing safety measures:
- To ensure the safe operation of your power inverter, consider implementing the following safety measures:
- Install a fuse or circuit breaker to protect against excessive current.
- Use insulated wires and connectors to prevent electrical shocks.
- Incorporate over-voltage and over-temperature protection mechanisms.
Optimizing efficiency through insulation and cooling:
- You can improve the efficiency of your power inverter by focusing on insulation and cooling techniques:
- Insulate the circuit board to minimize current leakage and ensure proper insulation between components.
Incorporating additional features for convenience:
- Lastly, for added convenience and functionality, you can consider incorporating these additional features:
- USB charging ports for charging mobile devices.
- LED indicators for power status and fault detection.
- Automatic shutdown or sleep mode for energy conservation.
Final Steps and Considerations:
Properly labeling and documenting the power inverter:
- Once your power inverter is fully functional, it is important to label it correctly and document its specifications and operating instructions. This will be helpful for future reference and troubleshooting.
Maintenance and troubleshooting tips:
- To ensure optimal performance and longevity of your power inverter, follow these maintenance and troubleshooting tips:
- Regularly clean the enclosure and cooling fan to prevent dust buildup.
- Inspect and tighten the connections periodically.
- If any issues arise, refer to the circuit diagram and step-by-step guide for troubleshooting.
Safety precautions and guidelines:
- Remember to always prioritize safety when working with electricity. Follow these precautions and guidelines:
- Disconnect the power source before making any changes or repairs.
- Wear appropriate protective gear, such as gloves and safety glasses.
- Work in a well-ventilated area to prevent the buildup of potentially harmful gases.
Now that you have a step-by-step guide to creating a powerful power inverter, you can embark on this exciting DIY project with confidence. Enjoy the process of building and experimenting with your own custom power inverter!
Frequently Asked Questions Of How To Make A Power Inverter
How To Make Inverter Power At Home?
To make inverter power at home: 1. Choose a suitable power inverter according to your energy needs. 2. Connect the inverter to a DC power source, like a battery or solar panels. 3. Make sure the connections are secure and follow the manufacturer’s instructions.
4. Turn on the inverter and enjoy the power supply it produces in your home.
Can You Build Your Own Inverter?
Yes, you can build your own inverter by carefully following DIY instructions and using the right components.
How To Make A Car Power Inverter?
To make a car power inverter, follow these steps: gather necessary materials, connect a power inverter to the car battery, ensure a grounded connection, and test the inverter before use.
How Many Batteries Do I Need To Run A 2000 Watt Inverter?
To run a 2000 watt inverter, you will generally need multiple batteries, depending on the ampere-hour (AH) rating.
Conclusion
Making a power inverter can be an exciting and rewarding project for DIY enthusiasts. By following the steps outlined in this guide, you can create a functional power inverter to meet your needs. Remember to gather all the necessary materials, carefully follow the instructions, and prioritize safety throughout the process.
As you embark on this journey, you will not only gain a deeper understanding of power inverters but also develop new problem-solving and technical skills. This project is not only cost-effective but also provides you with a sense of accomplishment as you witness your creation in action.
Whether you plan to use the power inverter for camping trips, emergency backup power, or simply to learn about electronics, this project offers numerous benefits. So, roll up your sleeves, get your tools ready, and let your creativity and curiosity guide you as you embark on the journey of making your very own power inverter.
Happy DIY-ing!