How to Hook Up Power Inverter: Expert Tips for Easy Installation
To hook up a power inverter, connect the inverter’s positive cable to the vehicle’s positive battery terminal and the negative cable to the negative terminal, ensuring a secure connection. Power inverters are a useful tool for converting direct current (DC) electricity from a car battery into alternating current (AC) that can power various devices.
Whether you’re on a road trip, camping in the great outdoors, or experiencing a power outage, knowing how to hook up a power inverter is valuable knowledge. By following a few simple steps, you’ll be able to connect the power inverter to your vehicle’s battery, allowing you to use your household appliances and electronic devices, such as laptops, smartphones, and kitchen appliances, wherever you go.
We’ll guide you through the process of hooking up a power inverter with ease and safety in mind.
Understanding Power Inverters
Understanding power inverters and how to hook them up can be a straightforward process. By following a few simple steps, you can connect a power inverter to your vehicle or battery, allowing you to convert DC power into AC power for various devices and appliances.
With the right knowledge and proper connections, you can easily utilize a power inverter to meet your power needs on the go.
Power inverters are essential devices that convert DC (direct current) power from a battery or solar panel into AC (alternating current) power for electronic devices. They enable you to use household appliances and electronics while on the road or in areas without access to traditional power sources.
To help you comprehend power inverters and their applications, this section will cover two key aspects: what power inverters are and how they work, as well as the different types of power inverters and their various applications.
What Is A Power Inverter And How Does It Work?
A power inverter is a device that changes the electrical current flow, converting DC power into AC power. Understanding this process will give you a clearer picture of how power inverters work:
- A power inverter takes DC power from a battery or other power sources and converts it into AC power, which is commonly used in homes and offices.
- The inverter’s input connects to a DC power source, such as a car battery, while the output provides AC power for your devices.
- It uses an internal circuitry that changes the DC voltage into AC voltage of the desired frequency and magnitude.
- Power inverters generate a modified or pure sine wave output, depending on the type of inverter, to mimic the characteristics of power from the electrical grid.
Different Types Of Power Inverters And Their Applications:
Power inverters come in various types, each designed for a specific purpose. Understanding the different types will help you choose the most suitable inverter for your needs:
- Modified Sine Wave Inverters:
- Ideal for powering simple electronics and appliances such as lights, fans, and power tools.
- Cost-effective option compared to pure sine wave inverters.
- May cause slight distortion and noise in certain devices, affecting audio and video quality.
- Pure Sine Wave Inverters:
- Suitable for powering sensitive electronics like laptops, TVs, refrigerators, and medical equipment.
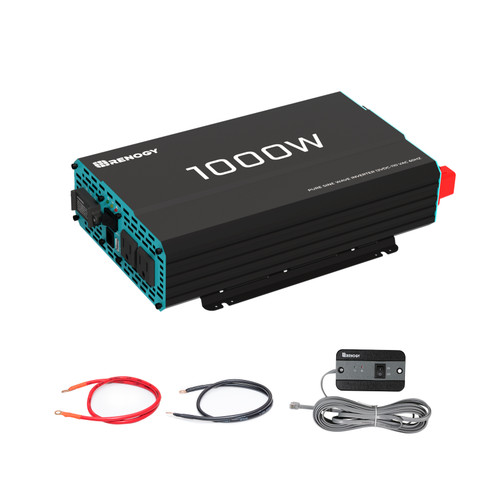
- Provides a clean and stable power supply, identical to that of the electrical grid.
- Compatible with a wide range of devices and ensures optimal performance without any distortion.
- Grid-Tie Inverters:
- Designed for grid-connected solar power systems.
- Convert DC power generated by solar panels into AC power that can be fed back into the electrical grid.
- Allows you to offset your electricity consumption and potentially earn credits or reduce your utility bills.
- Off-Grid Inverters:
- Specifically used in off-grid solar power systems or standalone battery systems.
- Convert DC power from batteries or solar panels into AC power to run appliances and devices.
- Essential for remote areas without access to electricity or during power outages.
Understanding these different types of power inverters and their applications will enable you to make an informed decision when purchasing or hooking up a power inverter. Whether you plan to power basic appliances or highly sensitive electronics, there is a suitable power inverter available for your specific needs.
Credit: www.mikealbert.com
Planning Your Power Inverter Installation
Planning your power inverter installation can be a breeze when you know how to hook it up properly. Take the time to follow these steps to ensure a seamless and efficient installation process for your power inverter.
Assessing your power needs and choosing the right inverter:
- Determine your power requirements: Assess the devices you plan to run with the power inverter and calculate the total wattage needed. Consider both the continuous power and peak power requirements.
- Select the appropriate inverter size: Choose an inverter that can handle your power needs. Opt for one with a slightly higher wattage rating to ensure it can handle peak power demands without issues.
- Consider waveforms: Decide if you need a pure sine wave or modified sine wave inverter based on the sensitive devices you’ll be using. Pure sine wave inverters are ideal for delicate electronics.
- Determine the input voltage: Check the input voltage of your devices to determine whether you need a 12V, 24V, or 48V inverter.
Identifying a suitable location for installation:
- Find a well-ventilated area: Install the power inverter in a location with good airflow to prevent overheating. Avoid enclosed spaces and ensure the inverter remains cool during operation.
- Keep it dry: Ensure the installation spot is dry and protected from moisture. Moisture can damage the inverter and increase the risk of electrical hazards.
- Provide adequate clearance: Allow sufficient space around the power inverter for proper ventilation and maintenance. Follow the manufacturer’s guidelines for recommended clearance distances.
- Secure the inverter: Mount the inverter securely to minimize vibrations and ensure it remains firmly in place. This reduces the risk of damage and ensures stable operation.
By carefully assessing your power needs and selecting the right inverter, as well as finding a suitable location for installation, you can ensure a successful and efficient power inverter setup.
Gathering The Required Tools And Materials
To successfully hook up a power inverter, gathering the necessary tools and materials is crucial. This includes items like cables, a power inverter, and a stable power source. By having the right equipment on hand, you can ensure a seamless power connection for your electronic devices.
If you’re looking to set up a power inverter, it’s essential to have the right tools and materials at your disposal. This section will walk you through the necessary items needed for a successful installation. Before you get started, make sure you have the following:
Essential Tools For Power Inverter Installation:
- Wire cutters: These are crucial for cutting and stripping wires to the appropriate length.
- Screwdrivers: Different screwdrivers, such as flathead and Phillips, will be necessary for securing connections.
- Crimping tool: This tool is essential for creating secure wire connections.
- Voltage tester: A voltage tester helps ensure that the power source is properly disconnected.
- Drill and bits: Using a drill with the correct drill bits allows for easy installation of the inverter in your desired location.
- Safety gear: Don’t forget to wear gloves and safety glasses to protect yourself during the installation process.
Additional Materials Needed For A Successful Setup:
- Power inverter: Depending on your power requirements, choose an inverter that meets your needs.
- Wiring: You’ll need the appropriate gauge wiring to connect the inverter to your power source and to the desired electrical devices.
- Fuses and fuse holder: These are necessary for circuit protection and should be included in your setup.
- Electrical tape: Use electrical tape to secure and insulate wire connections.
- Terminal connectors: Terminal connectors help ensure a secure connection between wires and devices.
- Mounting hardware: Depending on where you plan to install the inverter, you may need screws or other mounting materials.
- User manual: Always refer to the manufacturer’s manual for specific installation instructions and important safety information.
Having the right tools and materials is crucial to a successful power inverter installation. Gather these essentials before you start, and you’ll be well-prepared for the next steps of the process.
Preparing For Installation
Learn how to hook up a power inverter by following these easy steps for a seamless installation process.
Before you start installing your power inverter, there are a few important steps you need to take to ensure a safe and successful process. In this section, we’ll discuss the safety precautions you should follow and how to examine your vehicle’s electrical system compatibility.
Safety Precautions To Take Before Starting The Installation Process:
- Disconnect the negative battery cable: Before you begin working with any electrical components, it’s crucial to disconnect the negative battery cable. This step will help prevent any accidental shocks or short circuits during the installation.
- Wear protective gear: When working with electrical systems, safety should always be your priority. Make sure to wear protective gloves and safety glasses to minimize the risk of injury.
- Choose a suitable location: Selecting an appropriate spot to install your power inverter is crucial for both functionality and safety. Look for a well-ventilated area that is away from any flammable materials or sources of moisture.
- Read the user manual: Familiarize yourself with the user manual of your power inverter. Understand the manufacturer’s guidelines, specifications, and any specific installation instructions they provide.
- Inspect the wiring and connections: Inspecting the wiring and connections of your power inverter is essential. Look for any frayed wires, loose connections, or signs of damage. If you notice any issues, address them before proceeding with the installation.
By following these safety precautions, you can ensure a smooth and secure power inverter installation process. Now that you’ve taken the necessary safety measures, let’s move on to examining your vehicle’s electrical system compatibility.
Installing The Power Inverter
A step-by-step guide to easily connect a power inverter, ensuring uninterrupted power supply from your vehicle’s battery. Securely attach the inverter to a stable surface, connect the positive and negative cables, and plug in your devices for instant power on the go.
So, you’ve purchased a power inverter and now it’s time to install it in your vehicle. This guide will walk you through the process step by step, ensuring that you can hook up your power inverter safely and securely.
Connecting The Inverter To The Vehicle’S Battery
To connect the power inverter to your vehicle’s battery, follow these steps:
- Start by locating a suitable mounting location for the inverter. It should be securely fastened and easily accessible.
- Identify the positive and negative terminals on your vehicle’s battery. Typically, the positive terminal will be marked with a plus sign (+), and the negative terminal will be marked with a minus sign (-).
- Connect the positive cable from the power inverter to the positive terminal on the battery. Ensure a tight and secure connection.
- Connect the negative cable from the power inverter to the negative terminal on the battery. Again, make sure it is securely fastened.
- Once both cables are securely connected, double-check their tightness to avoid any potential loose connections.
Securing The Inverter And Wiring Properly
Properly securing the power inverter and wiring is essential for safety and longevity. Follow these guidelines:
- Use sturdy mounting brackets or straps to secure the power inverter to a stable surface in your vehicle. This will prevent it from moving or vibrating during operation.
- Ensure that the wiring is protected from any sharp objects or potential damage. This can be done by using wire loom or conduits to cover the cables.
- Avoid running the wiring near hot components or sources of heat, as excessive heat can damage the wiring.
- Use zip ties or electrical tape to neatly organize and secure the wiring, keeping it away from moving parts or areas prone to moisture.
- Double-check all connections and wiring before powering on the inverter to ensure everything is properly secured.
By following these steps, you can successfully install your power inverter and enjoy the convenience of powering your devices on the go. Remember to prioritize safety and secure installation to avoid any potential hazards.
Proper Grounding And Electrical Connections
Ensure a proper grounding and electrical connection when hooking up a power inverter. This is essential for safe usage and to avoid any electrical hazards. Take necessary precautions to establish a secure and efficient power connection.
Importance Of Grounding And Its Impact On The Inverter’S Performance
Proper grounding and electrical connections are crucial when it comes to hooking up a power inverter. By understanding the importance of grounding and following the correct procedures for electrical connections, you can ensure the safe and optimal performance of your inverter.
Here’s why grounding is essential and how it can impact your inverter’s performance:
Proper Grounding:
- Grounding is the process of connecting an electrical system to the Earth, providing a path for electrical faults to dissipate safely.
- It helps protect the inverter and connected devices from electrical surges and potential damage.
- Without proper grounding, there can be a risk of electric shock and fire hazards.
- Adequate grounding ensures electromagnetic compatibility and reduces the risk of interference with other electronic devices.
Impact On The Inverter’S Performance:
- Grounding establishes a stable reference potential, reducing the risk of electrical noise and ensuring a clean power supply.
- It helps prevent voltage fluctuations and ensures consistent power output from the inverter.
- Proper grounding also facilitates efficient fault detection and protection mechanisms, ensuring the safety of the inverter and connected equipment.
- Inadequate grounding can result in unstable power output, reduced efficiency, and potential damage to the inverter and connected devices.
Ensuring Secure And Correct Electrical Connections:
- Check the inverter’s manufacturer instructions to understand the specific requirements for electrical connections.
- Use appropriate wiring sizes to handle the current load and minimize voltage drop.
- Ensure that all connections, including the battery terminal connections and the inverter’s input/output connections, are secure and free from corrosion.
- Use protective measures like fuses and circuit breakers to protect the inverter and connected devices from potential short circuits and overloads.
- Regularly inspect and maintain the electrical connections to avoid loose connections, which can cause heat buildup and increase the risk of malfunction.
Remember, grounding and electrical connections are vital aspects of hooking up a power inverter. By following proper procedures, you can ensure the safe and efficient operation of your inverter and enjoy reliable power supply wherever you go.
Testing And Troubleshooting
Learn how to effectively connect a power inverter and troubleshoot any issues that may arise. Our step-by-step guide provides expert tips and techniques for a seamless power inverter hookup experience.
With a power inverter properly installed, you’re now ready to test it and ensure everything is working as expected. In this section, we’ll walk you through how to test your power inverter after installation and provide some troubleshooting techniques for common issues that may arise.
How To Test The Power Inverter After Installation:
- Start by connecting the power inverter to a fully charged battery or a power source. Ensure that the inverter is turned off during this step.
- Next, connect the device or appliances you want to power to the inverter using the appropriate cables and plugs. Make sure to check the wattage rating of your inverter and the power requirements of the devices you want to connect to avoid overloading the system.
- Once everything is connected, turn on the power inverter using the designated switch or button.
- Check the LED indicators on the inverter. Most power inverters have indicator lights that show the status of the inverter. Look for a green LED to indicate that the inverter is working properly.
- Test the connected devices or appliances. Plug in a small device, like a phone charger, and ensure that it is receiving power. If it is working, then your power inverter is ready for use.
Common Issues And Troubleshooting Techniques:
- No power output: If you’re not getting any power output from the inverter, double-check that it is properly connected to the battery or power source. Also, ensure that the inverter’s power switch is turned on. If the issue persists, check the battery voltage and connections to make sure they are secure.
- Overheating: Power inverters can sometimes overheat, especially if they are being used at their maximum capacity for extended periods. To prevent overheating, periodically check the inverter’s temperature and ensure proper ventilation. If the inverter does overheat, let it cool down before using it again.
- Overload protection: If your inverter keeps shutting off or producing an alarm sound, it might be due to overload. Check if you’ve connected devices with a total power consumption that exceeds the inverter’s capacity. Disconnect some devices or appliances to lighten the load and prevent overloading.
- Strange noises or smells: Unusual noises or smells coming from the power inverter can indicate a problem. In this case, immediately disconnect the inverter from the power source and have it professionally inspected and repaired.
- Faulty outlets or plugs: If certain outlets on the inverter do not provide power or the plugs do not fit securely, check for any loose connections or damaged sockets. Contact the manufacturer for assistance or consider replacing the inverter if the issue persists.
Remember, safety is paramount when dealing with power inverters. Always read and follow the manufacturer’s instructions, and never attempt to repair or modify the inverter yourself unless you have the necessary expertise.
Maintenance And Safety Tips
Looking to hook up a power inverter? Ensure proper maintenance and safety with these helpful tips. Take precautions and follow instructions to safely connect and use your power inverter for optimal performance.
Whether you’re using a power inverter for camping trips or emergency purposes, it’s essential to prioritize maintenance and safety. Following these guidelines will ensure optimal performance and prevent any mishaps. Here are some tips to keep in mind:
Regular Maintenance To Ensure Optimal Performance
To maintain the efficiency and longevity of your power inverter, consider the following maintenance practices:
- Keep it clean: Regularly remove any dust or debris from the inverter’s surface to prevent overheating and ensure proper airflow.
- Check the wiring: Inspect the wiring connections to ensure they are secure and free from any signs of wear or damage. Loose connections can cause power disruptions and may even pose safety hazards.
- Monitor the battery: If you’re using a battery-based power inverter, keep an eye on the battery’s charge level. Regularly test and replace batteries as needed to avoid sudden failures during critical periods.
Safety Precautions To Follow When Using A Power Inverter
Safety should be the top priority when using a power inverter. Follow these precautions to minimize risks and protect both yourself and your devices:
- Grounding: Ensure that your power inverter is properly grounded to prevent electrical shocks. Refer to the manufacturer’s instructions for specific grounding requirements.
- Avoid overload: Do not overload the power inverter by connecting devices that exceed its maximum power capacity. Consult the inverter’s manual to determine the appropriate load.
- Proper ventilation: Place the power inverter in a well-ventilated area to prevent overheating. Avoid enclosures or tight spaces that restrict airflow.
- Disconnect when not in use: When the power inverter is not in use, disconnect it from the battery source to prevent any accidental power drain or potential electrical issues.
- Use quality wiring and fuses: Always use high-quality wiring and fuses that can handle the power load of your inverter. Cheap or substandard components can lead to malfunctions and safety hazards.
Remember, maintaining your power inverter and adhering to safety precautions are vital for its effective performance and your peace of mind. By following these guidelines, you can ensure a smooth and safe experience while using a power inverter.
Power Inverter Troubleshooting Tips
Having trouble with your power inverter? Learn how to properly hook it up and troubleshoot any issues with these helpful tips.
Troubleshooting Common Problems With Power Inverters:
- Inverter not turning on:
- Check if the inverter is properly connected to the power source.
- Make sure there isn’t a blown fuse or tripped circuit breaker.
- Verify if the inverter’s switch is turned on.
- Consider testing the battery to ensure it’s functioning correctly.
- No output power from the inverter:
- Confirm that the input voltage matches the inverter’s specifications.
- Validate the connections from the inverter to the battery are secure.
- Check if the inverter’s power indicator light is on.
- Inspect the wiring for any signs of damage or loose connections.
- Overheating:
- Ensure the inverter is placed in a well-ventilated area.
- Check if the inverter’s cooling fans are functioning properly.
- Avoid running the inverter at its maximum capacity for extended periods.
- Reduce the load connected to the inverter to prevent overheating.
- Unstable output voltage:
- Verify that the input voltage from the power source is stable.
- Check the battery’s charge level – low battery voltage can cause fluctuations.
- Inspect the inverter’s connections to the battery for any loose wiring.
- Consider using a voltmeter to measure the inverter’s output voltage.
Expert Tips For Resolving Issues Effectively:
- Read the user manual:
- The user manual provides valuable troubleshooting steps specific to your power inverter model.
- Familiarize yourself with the manual to understand the inverter’s functionalities and potential issues.
- Perform visual inspections:
- Regularly inspect the inverter, battery connections, and wiring for any signs of damage or loose connections.
- Fix any visible issues promptly to prevent potential problems later on.
- Check the battery:
- Ensure the battery is fully charged and in good condition to provide sufficient power to the inverter.
- Clean the battery terminals and connections to maintain proper conductivity.
- Use appropriate load:
- Be mindful of the power requirements of devices connected to the inverter.
- Verify that the inverter’s wattage capacity can handle the total load without overloading.
- Seek professional help:
- If you’re unable to resolve the issues on your own or unsure about the solution, contact a professional technician who specializes in power inverters.
By following these troubleshooting tips and utilizing expert advice, you can effectively address common power inverter issues and ensure a smooth and uninterrupted power supply.
Frequently Asked Questions On How To Hook Up Power Inverter
How Do You Hook Up An Inverter To A Car Battery?
To hook up an inverter to a car battery, follow these steps: First, connect the positive terminal of the inverter to the positive terminal of the battery. Then, connect the negative terminal of the inverter to the negative terminal of the battery.
Finally, tighten the connections and make sure they’re secure.
How Do You Hook Up An Inverter To A 12 Volt Battery?
To hook up an inverter to a 12 volt battery, connect the positive terminal of the inverter to the positive terminal of the battery and the negative terminal to the negative terminal of the battery.
How Do I Connect My Inverter?
To connect your inverter, follow these steps: 1. Identify the input and output connections on your inverter. 2. Ensure the power source is switched off before making any connections. 3. Connect the positive (+) and negative (-) terminals of your battery to the corresponding terminals on the inverter.
4. Connect your load (appliances or devices) to the output terminals of the inverter. 5. Once all connections are made, switch on the power source and your inverter should be ready to use.
Can I Connect A Power Inverter Directly To A Battery?
Yes, you can connect a power inverter directly to a battery.
Conclusion
Hooking up a power inverter is a simple yet essential process, allowing you to have portable and convenient power wherever you go. By following the step-by-step instructions outlined in this blog post, you can ensure a smooth and successful installation.
Remember to choose the right power inverter for your needs, connect and secure the cables properly, and test the system before use. Additionally, always prioritize safety by using protective gear and following manufacturer guidelines. Whether you need power for camping trips, emergency situations, or simply for convenience while on the road, a power inverter can be a valuable tool.
So, don’t hesitate to get started on your power inverter installation journey and enjoy the benefits of having reliable power at your fingertips.

