How to Get 240V from Solar Panel?
To get 240V from a solar panel, you’ll need to connect the panel to a charge controller, then connect the inverter to the charge controller. This will allow you to convert the DC power from the solar panel into AC power at 240V.
Installing a solar power system to generate 240V electricity is an excellent way to harness renewable energy and reduce reliance on the grid. By following a few simple steps, you can convert the DC power produced by the solar panel into usable 240V AC power.
First, connect the solar panel to a charge controller. Then, connect the inverter to the charge controller. This setup will effectively convert the DC power into AC power at 240V, enabling you to power appliances and devices that require 240V electricity. It’s important to use a pure sine wave inverter when working with high-power systems or sensitive equipment like computers for optimal performance. Take advantage of solar energy and enjoy the benefits of an independent power source with a 240V solar panel setup.
Connecting Solar Panels To The Charge Controller
To get 240V from a solar panel, you need to connect it to a charge controller. The charge controller regulates the flow of electricity from the panels to ensure the batteries are charged efficiently.
Proper Wiring For Connecting Solar Panels To Charge Controller:
- Use appropriate wiring gauge based on the distance between solar panels and charge controller.
- Connect the positive (+) terminal of the solar panel to the positive (+) terminal of the charge controller.
- Connect the negative (-) terminal of the solar panel to the negative (-) terminal of the charge controller.
- Use MC4 connectors or appropriate wiring connectors to ensure secure connections.
Step-By-Step Guide For Ensuring Efficient Connection:
- Determine the location of the solar panels and charge controller.
- Measure the distance between the solar panels and charge controller to determine the appropriate wiring gauge.
- Install the MC4 connectors on the solar panel cables.
- Connect the positive (+) terminal of the solar panel to the positive (+) terminal of the charge controller using a MC4 connector.
- Connect the negative (-) terminal of the solar panel to the negative (-) terminal of the charge controller using a MC4 connector.
- Secure the connections by tightening the connectors.
- Verify the polarity of the connections to ensure proper wiring.
- Double-check all connections to ensure they are secure and tight.
Safety Precautions To Consider During The Installation Process:
- Always follow the manufacturer’s instructions and guidelines during the installation process.
- Make sure to disconnect the solar panels from the charge controller before making any connections.
- Wear appropriate personal protective equipment (PPE), such as gloves and safety goggles, to protect yourself from electrical hazards.
- Ensure that the solar panels are not exposed to direct sunlight while making the connections.
- Avoid working in wet or damp conditions to minimize the risk of electric shock.
- Test the system with a multimeter before connecting the solar panels to the charge controller to ensure there are no electrical issues.
- Seek professional assistance if you are unsure about any step in the installation process.
Remember, proper wiring and safety precautions are crucial to ensure the efficient and safe operation of your solar panel system. By following these guidelines, you can successfully connect your solar panels to the charge controller and harness the power of the sun.
Connecting The Charge Controller To Inverter
To get 240V from a solar panel, you need to connect the charge controller to the inverter. This ensures that the solar energy captured by the panel is converted and usable for powering appliances and accessories off-grid.
Understanding The Role Of A Charge Controller In The System:
- The charge controller plays a vital role in a solar panel system by regulating the flow of electricity from the panels to the batteries.
- It controls the charging process, preventing overcharging and ensuring the batteries are properly maintained.
- By monitoring the voltage and current, the charge controller protects the batteries from damage, extending their lifespan.
Importance Of Selecting A Compatible Inverter For 240V Output:
- When aiming to generate 240V output from solar panels, it is essential to choose an inverter that is compatible with this voltage.
- The inverter converts the DC power generated by the solar panels into AC power suitable for household appliances.
- Selecting an inverter that supports 240V output ensures that you can power standard 240V devices and appliances.
Step-By-Step Procedure For Connecting The Charge Controller To The Inverter:
- Ensure that the solar panels are properly connected to the charge controller, following the manufacturer’s instructions.
- Identify the output terminals on the charge controller and the input terminals on the inverter.
- Connect the positive (+) terminal of the charge controller output to the positive (+) terminal of the inverter input.
- Connect the negative (-) terminal of the charge controller output to the negative (-) terminal of the inverter input.
- Double-check the connections to ensure they are secure and properly tightened.
- Review the inverter’s manual for any additional steps or considerations specific to the model you are using.
- Once all connections are made, power on the inverter according to its instructions.
- Test the system by connecting a 240V device or appliance to the inverter’s output and verifying that it functions properly.
- Monitor the system regularly to ensure it is operating efficiently and troubleshoot any issues that may arise.
- Enjoy the benefits of your solar-powered 240V system, knowing you are reducing your reliance on grid electricity and saving money on your energy bills.
Remember, it is important to refer to the manufacturer’s instructions for both the charge controller and inverter when connecting them to ensure proper installation.
Demonstration Of The 240V System
Discover how to harness the power of solar panels to generate 240V electricity with a step-by-step demonstration. Learn how to connect the solar panels to a charge controller, inverter, and more to create a 240V system for off-grid power.
Testing The Functionality And Efficiency Of The Connected Solar Panels, Charge Controller, And Inverter:
- Conduct a voltage test on the solar panels to ensure they are generating the required 240V. Use a multimeter to measure the voltage output and confirm it matches the desired level.
- Check the charge controller’s performance by monitoring the battery charging process. Ensure that the charge controller is effectively regulating the flow of electricity from the solar panels to the batteries.
- Evaluate the inverter’s functionality by connecting a device that requires 240V power. Verify that the inverter converts the DC power from the solar panels into AC power at the desired voltage.
- Assess the overall system efficiency by calculating the power output of the solar panels, comparing it to the power consumed by the connected devices. This will help determine how well the system is converting solar energy into usable electricity.
Potential Challenges And How To Troubleshoot Them Effectively:
- Insufficient solar panel output: If the solar panels are not generating enough power, check for any shading or obstructions that may be reducing their efficiency. Install the panels in a location with maximum exposure to sunlight.
- Inadequate battery charging: If the batteries are not charging properly, check the wiring connections between the solar panels, charge controller, and batteries. Ensure they are securely connected and free from any corrosion or damage.
- Inverter not producing the desired voltage: If the inverter is not generating 240V, make sure it is capable of handling the required voltage. Check the input and output settings of the inverter and adjust if necessary.
- System overload: If the connected devices are causing the system to overload, consider adding additional solar panels or batteries to increase the system’s capacity. Make sure the inverter can handle the increased power load.
Tips For Optimizing The System’S Performance For Long-Term Use:
- Regularly clean the solar panels to remove any dirt, dust, or debris that could reduce their efficiency. Keep them free from shading by trimming nearby trees or vegetation.
- Monitor the system’s performance through a remote monitoring system or by periodically checking the voltage output and battery charging status. This will help identify any issues early on.
- Ensure proper maintenance of the batteries by checking their water levels (for flooded batteries) and testing their voltage regularly. Replace any faulty batteries promptly to maintain optimal system performance.
- Upgrade to more efficient solar panels or inverters if available. Newer technologies can provide higher power output and improved system efficiency.
- Consider installing surge protection devices to safeguard the system from voltage spikes or unstable electricity supply.
- Consult with a professional solar installer or technician for regular inspections and system tune-ups to ensure optimal performance and longevity.
By following these guidelines, you can successfully demonstrate the functionality of the 240V system, troubleshoot any potential challenges, and optimize the system’s performance for long-term use.

Credit: sungoldpower.com
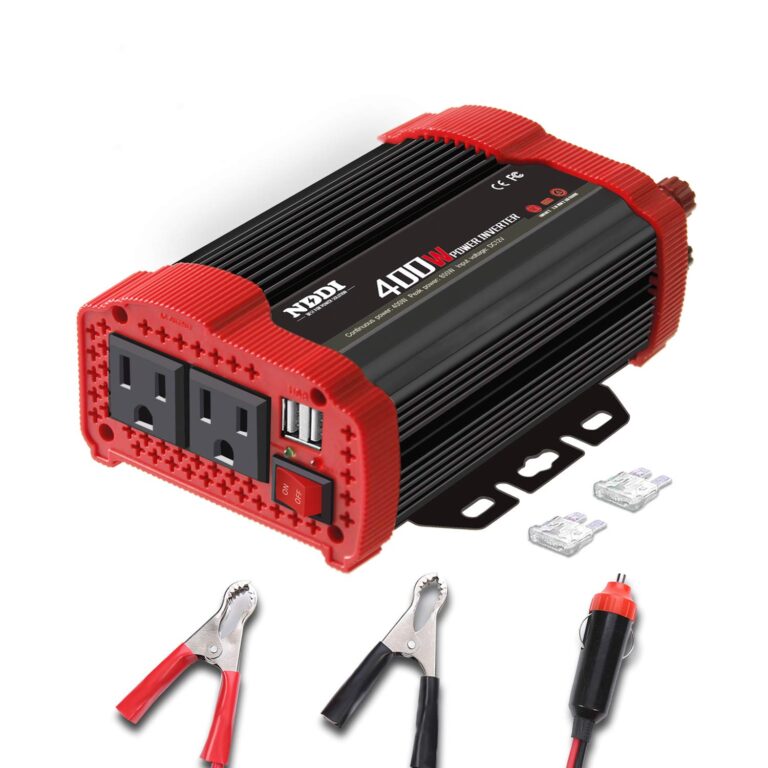
Can I Use an Inverter to Get 240V AC Power from My Solar Panel System?
Yes, you can use an inverter for 24v dc to 120v ac to obtain 240V AC power from your solar panel system. An inverter converts the direct current (DC) produced by your solar panels into alternating current (AC) suitable for powering household appliances and other devices. This enables you to leverage your solar energy to run devices that require 240V AC power.
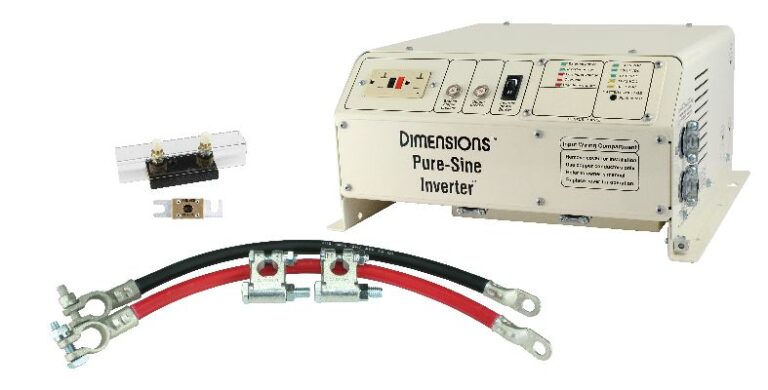
Can I Use a 220V Solar Inverter to Get 240V from my Solar Panel?
Yes, you can use a 220v solar inverter to obtain 240V from your solar panel. The 220V solar inverter is designed to convert the direct current (DC) generated by the solar panel into alternating current (AC) at the required voltage. This way, you can use the power output from the inverter to meet your 240V energy needs.
Can a 48V to 120V inverter be used to convert power from solar panels to 240V?
Using an inverter guide for 48v to 120v, it is possible to convert power from solar panels to 240V. A 48V to 120V inverter can step up the voltage from the solar panels and provide the required 240V output. This allows for efficient use of solar power, enabling the connection of various electrical devices and appliances that operate at 240V.
Frequently Asked Questions Of How To Get 240V From Solar Panel
Can You Run 240V Off Solar?
You can run 240V AC mains appliances and accessories off-grid from a 12V or 24V battery in a solar power system by using an inverter. To ensure compatibility with high power systems or sensitive equipment like computers, it is recommended to use a pure sine wave inverter.
These inverters convert the DC power generated by the solar panels into AC power at the desired voltage level (240V). By connecting the inverter to the battery bank, you can power your 240V appliances using solar energy. It is important to note that the number of solar panels required depends on the power consumption of your appliances and the available solar energy in your area.
It is advisable to consult with a solar energy professional to determine the optimal system size for your specific needs.
How Many Solar Panels Does It Take To Produce 240 Volts?
In order to produce 240 volts, the number of solar panels needed depends on the wattage rating of each panel. A 300-watt solar panel can generate approximately 240 volts. Therefore, you would need one 300-watt solar panel to produce 240 volts.
However, if you have solar panels with a lower wattage rating, you would need multiple panels to reach the desired voltage. It’s important to consider the wattage rating of the panels you have or plan to purchase to determine how many panels you need to achieve 240 volts.
Keep in mind that other factors such as sunlight intensity and panel efficiency can also affect the power generation of the solar panels.
How Do You Control The Voltage Output Of A Solar Panel?
To control the voltage output of a solar panel, you can use a charge controller or an inverter. A charge controller regulates the voltage and current from the solar panel to prevent overcharging of the batteries. It ensures that the voltage is consistent and suitable for charging the batteries.
An inverter, on the other hand, converts the DC (direct current) electricity generated by the solar panel into AC (alternating current) electricity, which is the standard voltage used in most homes and appliances. This allows you to use the solar energy to power AC devices and appliances.
Both the charge controller and inverter can be adjusted or programmed to maintain a specific voltage output according to your requirements. By using these devices, you can ensure that the voltage output of the solar panel is controlled and optimized for efficient energy usage.
How To Convert Solar Panel Dc To Ac?
To convert solar panel DC to AC, you need an inverter. Inverters convert the direct current (DC) produced by solar panels into alternating current (AC), which is the electricity used in homes and businesses. When choosing an inverter, it’s important to consider the wattage of your solar panels and the power requirements of your appliances.
To convert solar panel DC to AC: 1. Select an inverter that matches the wattage of your solar panels. 2. Install the inverter in a safe and secure location near your solar panels. 3. Connect the DC output of your solar panels to the DC input of the inverter.
4. Connect the AC output of the inverter to your home or business electrical system. By following these steps, you can effectively convert solar panel DC to AC and use the electricity generated by your solar panels to power your appliances and devices.
Make sure to consult a professional or refer to the manufacturer’s instructions for precise installation guidance.
Conclusion
Without the need for additional transformers, it is possible to directly produce 240V AC mains power from a solar panel system. By incorporating an inverter into the system, you can convert the DC power generated by the solar panels into the required AC power.
This opens up a world of possibilities for off-grid applications and allows you to power a wide range of appliances and accessories. It is important to choose a high-quality pure sine wave inverter for optimal performance, especially when dealing with sensitive equipment like computers.
Whether you are looking to power a small off-grid cabin or run essential appliances during power outages, harnessing 240V from solar panels is a viable and efficient option. By following the right installation steps and choosing the appropriate equipment, you can create a reliable and sustainable power source that meets your needs.
Embrace the benefits of solar power and enjoy the convenience of 240V AC from your solar panel system.