How are Solar Shingles Installed: A Step-by-Step Guide
Solar shingles are installed directly on the roof deck in place of conventional roofing shingles, eliminating the need for racks or mounting systems typically used with solar panels. Solar shingles are a revolutionary alternative to traditional solar panels, as they seamlessly integrate with the existing roof structure.
These shingles are directly installed on the roof deck, without the need for additional racks or mounting systems. This not only enhances the aesthetic appeal of the roof but also simplifies the installation process. By replacing conventional roofing shingles with solar shingles, homeowners can harness the power of solar energy while maintaining the functionality and appearance of their roof.
In addition, solar shingles are compatible with existing electrical systems, making it easy to connect them to the home’s electrical grid. As solar technology continues to evolve, solar shingles are becoming an increasingly popular choice for eco-conscious homeowners looking to reduce their carbon footprint and save on energy costs.
Understanding Solar Shingles
In recent years, solar energy has gained immense popularity as a sustainable and eco-friendly alternative to traditional energy sources. While solar panels have become commonplace on rooftops, a new innovation called solar shingles has emerged as a more aesthetically pleasing and efficient option. In this article, we will explore what solar shingles are, how they work, and the benefits they offer over traditional solar panels.
What Are Solar Shingles?
Solar shingles, also known as photovoltaic (PV) shingles, are solar cells that mimic traditional asphalt shingles in appearance. Unlike solar panels, which are mounted on racks, solar shingles are integrated directly into the roof deck. This seamless integration makes them virtually indistinguishable from regular shingles, creating a sleek and visually appealing solar solution.
How Do Solar Shingles Work?
Solar shingles work by harnessing the sun’s energy and converting it into electricity. Each individual solar shingle contains photovoltaic cells, which are made of semiconducting material such as silicon. These cells absorb sunlight and generate an electric current through the photovoltaic effect.
The generated electricity flows through interconnections between shingles and is collected in wires, which then connect to an inverter. The inverter converts the DC (direct current) electricity produced by the solar shingles into AC (alternating current) electricity that can be used to power household appliances.
Benefits Of Using Solar Shingles Over Traditional Solar Panels
Solar shingles offer several advantages over traditional solar panels:
- Improved aesthetics: Solar shingles blend seamlessly with the roof, providing a visually appealing solar solution that does not compromise the overall appearance of the home.
- Increased efficiency: Solar shingles are designed to maximize energy production by capturing sunlight from multiple angles throughout the day. This can result in a higher overall energy yield compared to traditional solar panels.
- Enhanced durability: Solar shingles are built to withstand the elements, offering the same level of protection as traditional roofing materials. This durability ensures longevity and reduces the need for frequent repairs or replacements.
- Space-saving: Unlike traditional solar panels, which require a significant amount of roof space, solar shingles integrate directly into the roof, making efficient use of available surface area.
- Energy savings: By harnessing the sun’s energy, solar shingles help reduce dependence on traditional energy sources, leading to lower electricity bills and long-term cost savings.
As solar technology continues to advance, solar shingles offer a promising alternative for homeowners who value both sustainability and aesthetics. With their seamless integration and efficiency, solar shingles are becoming an increasingly popular choice for those looking to harness the power of the sun.
Preparing For Solar Shingle Installation
Before embarking on the installation of solar shingles, there are several crucial steps you need to take to ensure a successful and efficient process. From assessing your roof’s suitability for solar shingles to obtaining necessary permits and approvals, proper preparation is essential. In this section, we will delve into each of these steps in detail.
Assessing Your Roof’s Suitability For Solar Shingles
The first step in preparing for solar shingle installation is assessing the suitability of your roof for this type of system. Solar shingles require a roof that receives ample sunlight throughout the day without any significant obstructions such as trees or nearby buildings casting shadows. Additionally, the roof structure should be in good condition and capable of supporting the added weight of the solar shingles.
During the assessment, it is also important to consider the roof’s orientation and angle, as these factors can affect the energy production of the solar shingles. Ideally, the roof should have a south-facing orientation and a pitch angle between 15 to 40 degrees for optimal performance.
Calculating The Required Number Of Solar Shingles
To determine the number of solar shingles needed for your installation, you will need to calculate the energy needs of your household or property. This calculation involves considering factors such as your average monthly electricity consumption and the available roof space for the solar shingles.
Consulting with a professional solar installer can help you accurately estimate your energy requirements and determine the appropriate number of solar shingles for your specific situation. They will also take into account any potential shading issues or other factors that may impact the solar shingle system’s efficiency.
Obtaining Necessary Permits And Approvals
Before commencing the installation of solar shingles, it is crucial to obtain any required permits and approvals from the local authorities or homeowner’s association. These permits ensure that the installation complies with local building codes and safety standards.
Working with a reputable solar installer can simplify this process, as they will be familiar with the necessary permits and can help you navigate through the paperwork. It is important not to overlook this step, as failing to obtain the proper permits can result in fines or legal issues down the line.
By thoroughly preparing for solar shingle installation, you can streamline the process and maximize the benefits of your solar energy system. Assessing your roof’s suitability, calculating the required number of solar shingles, and obtaining the necessary permits will set the stage for a successful installation and efficient operation of your solar shingle system.
Steps For Installing Solar Shingles
Installing solar shingles is a great way to harness the power of the sun and generate clean, renewable energy for your home. Solar shingles, also known as photovoltaic shingles, are designed to integrate seamlessly with your existing roof, providing an efficient and aesthetically pleasing solution for solar power generation. The installation process involves several steps to ensure a successful and long-lasting system. Let’s explore each step in detail:
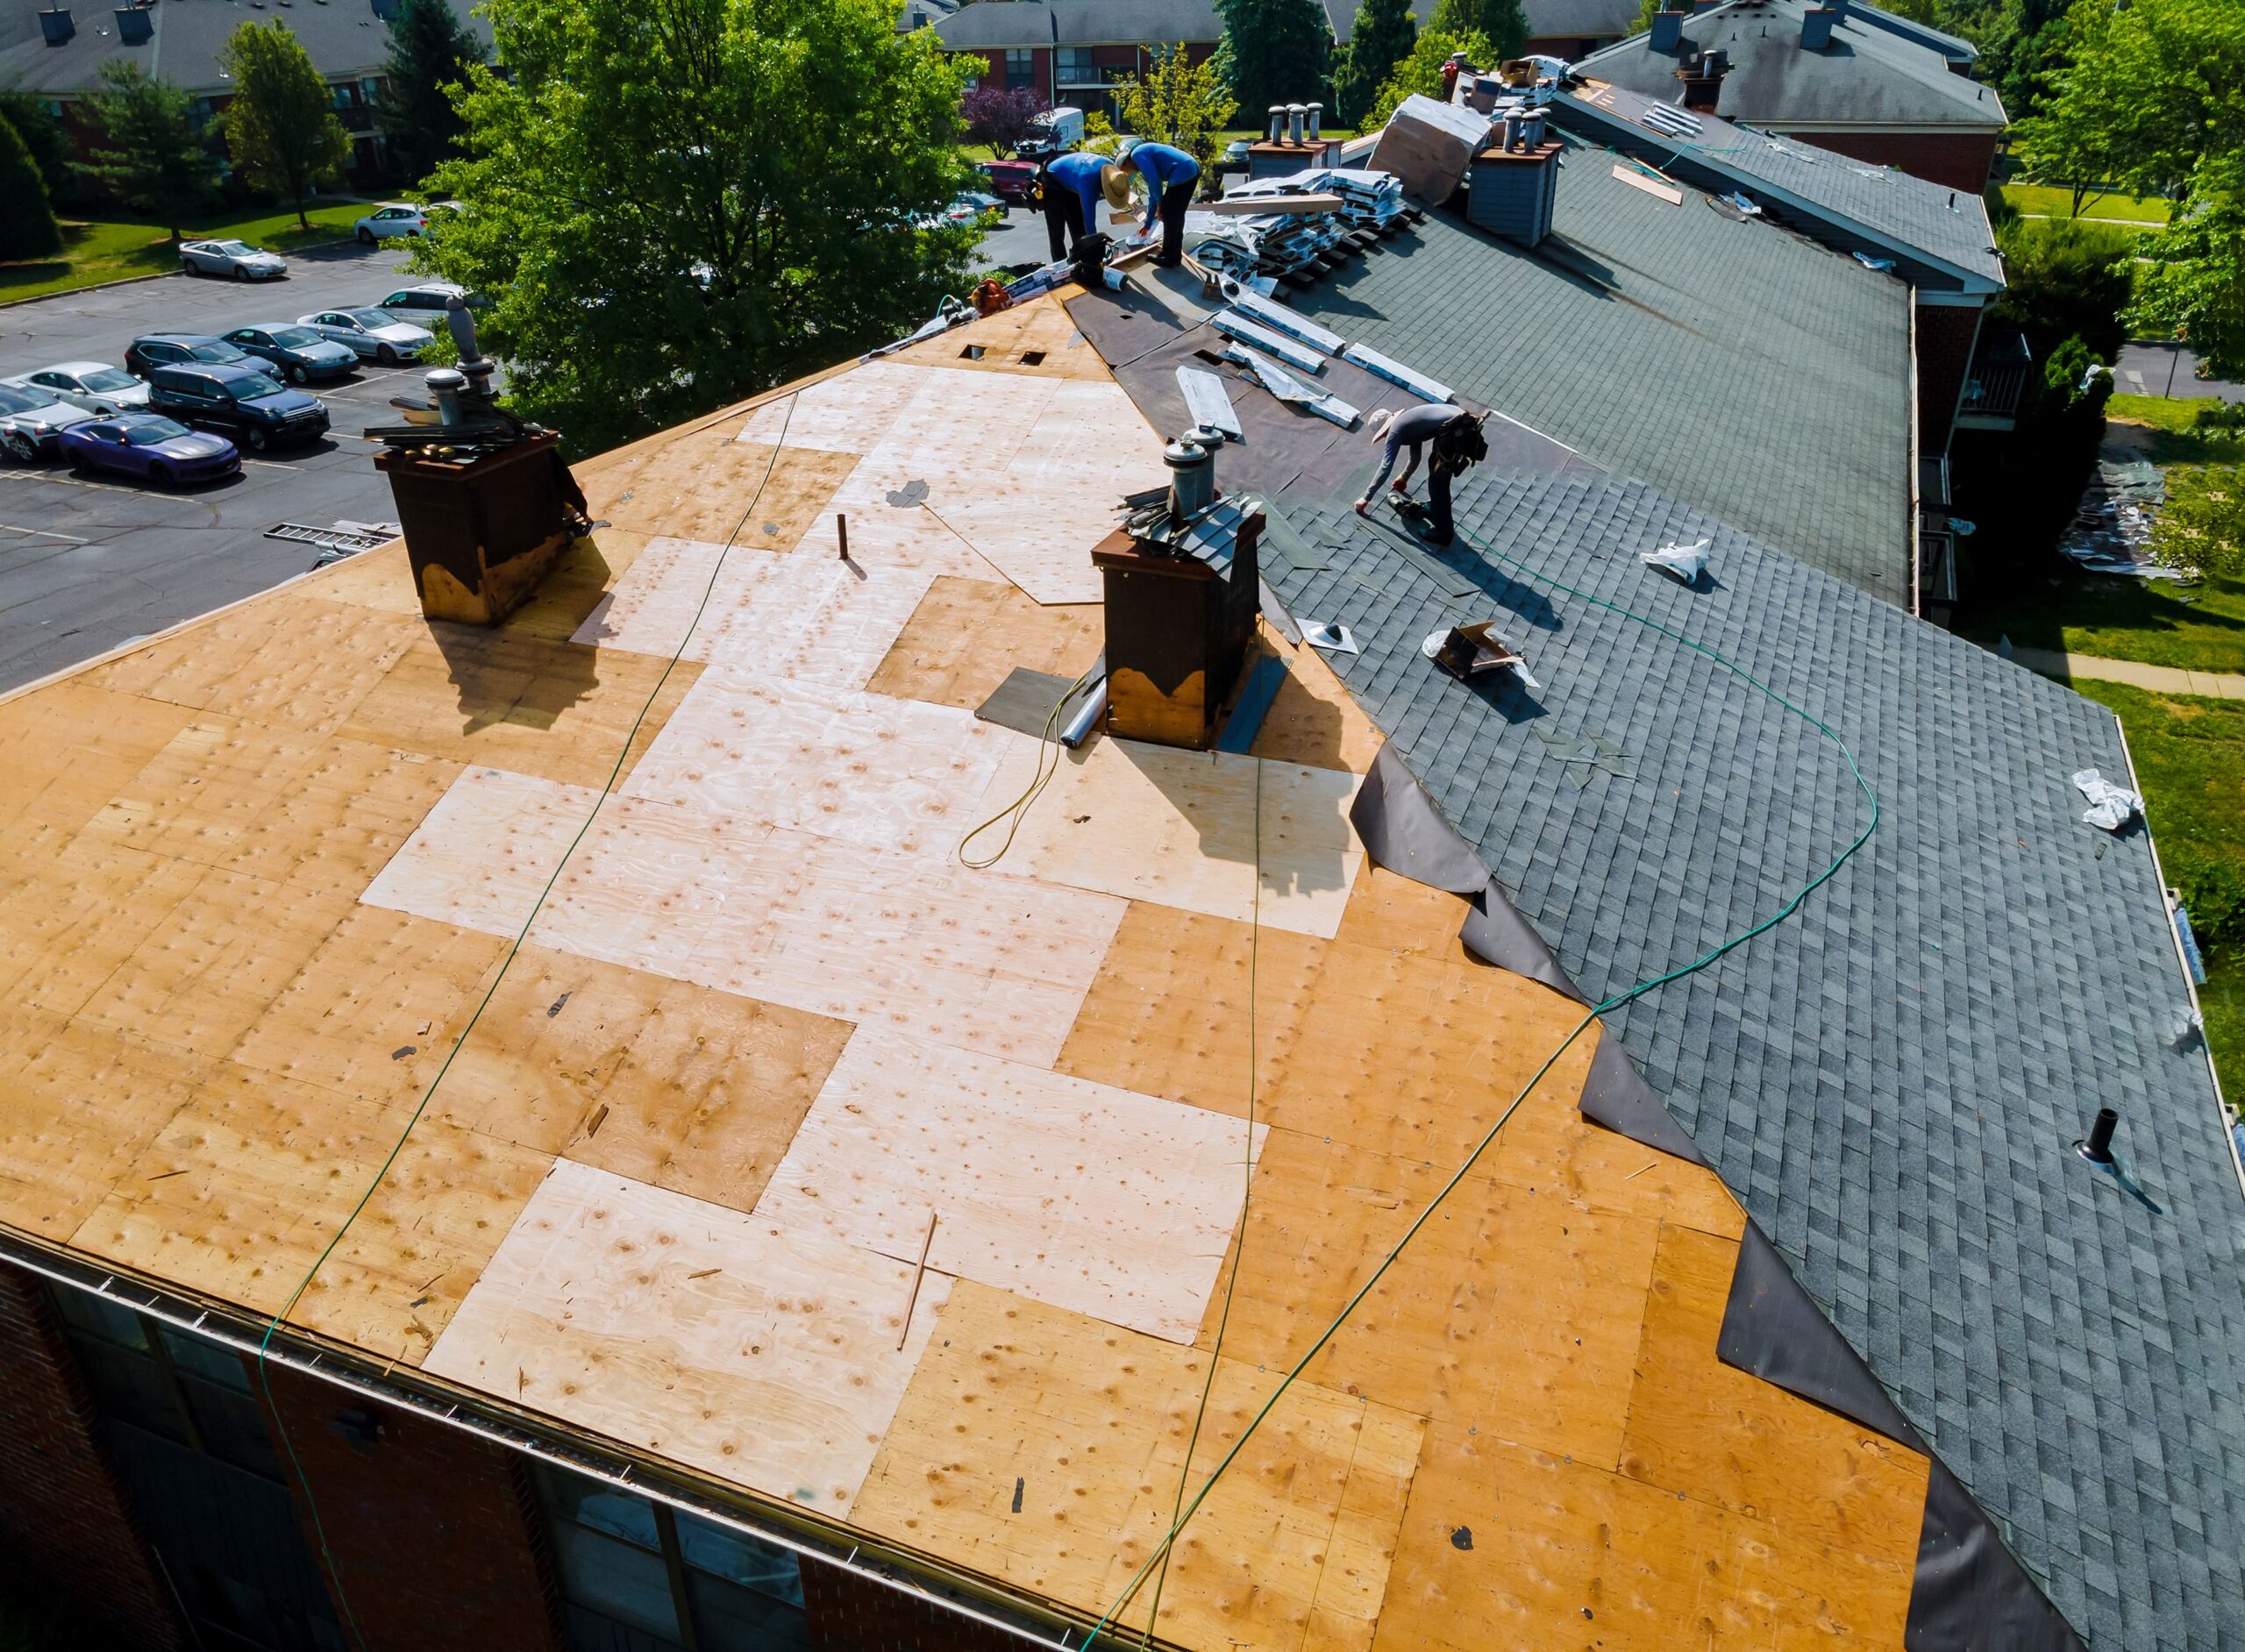
Step 1: Prepping The Roof
Before the installation of solar shingles can begin, it is essential to properly prep the roof. This involves two key tasks:
Inspecting and repairing the roof
Prior to installing solar shingles, a thorough inspection of the roof is necessary. Any existing damage, such as cracked or missing shingles, should be repaired to ensure a solid foundation for the solar shingles. This step is crucial to prevent any leaks or other issues down the line.
Cleaning the roof surface
Once the roof is inspected and repaired, it needs to be cleaned thoroughly. The surface should be free from dirt, debris, and any other obstructions, which could interfere with the installation process and the efficiency of the solar shingles. Pressure washing or using a gentle cleanser can remove grime and maximize the functionality of the system.
Step 2: Installing The Starter Strip
The starter strip serves as the base for the installation of solar shingles. It has two primary purposes:
Purpose of the starter strip
The starter strip provides a secure attachment point for the solar shingles and ensures a watertight seal. It also allows for proper air circulation under the shingles, which is important for preventing moisture buildup and maintaining the longevity of the roof.
Proper placement and installation
The starter strip should be aligned at the lower edge of the roof and positioned parallel to the eaves. It is typically secured with roofing nails, ensuring it is firmly attached to the roof. Proper placement and installation of the starter strip are essential for the successful integration of the solar shingles.
Step 3: Attaching The Solar Shingles
With the starter strip in place, it’s time to attach the solar shingles themselves. This step involves:
Mounting brackets and supports
Prior to attaching the solar shingles, mounting brackets and supports need to be installed on the roof. These brackets act as a foundation for the shingles, providing stability and allowing for easy installation.
Securing the solar shingles to the roof
Once the brackets are in place, the solar shingles can be securely attached. Each shingle is carefully positioned and fastened to the roof with screws or other appropriate fasteners. This ensures that the shingles are firmly in place and able to withstand various weather conditions.
Step 4: Wiring And Interconnections
After the solar shingles are attached, the wiring and interconnections need to be addressed. This step involves:
Connecting the solar shingles in series or parallel
Depending on the specific system configuration, the solar shingles are connected in either series or parallel. This arrangement determines how the electrical current flows through the system, ensuring optimal energy production.
Routing and securing the wiring
The wiring is carefully routed and secured to prevent any damage or exposure. It should follow proper electrical codes and guidelines to ensure safety and efficient operation. The wiring is typically hidden beneath the shingles or within conduit pipes for a clean and professional installation.
Step 5: Installing Flashing And Ventilation
To maintain the integrity of the roof and the effectiveness of the solar shingles, proper flashing and ventilation are crucial. This step involves:
Adding flashing around roof penetrations
When the solar shingles are installed, there may be penetrations on the roof, such as vents or chimneys. Flashing is added around these areas to provide an additional layer of protection against water infiltration.
Ensuring proper ventilation for the solar shingles
Proper ventilation is essential for the efficient operation of the solar shingles. It helps dissipate heat, prevents moisture buildup, and maximizes the lifespan of the roof. Ventilation options such as ridge vents or vented soffits are installed to promote airflow and maintain a balanced temperature within the roof system.
Step 6: Testing And Commissioning
Once all the components are installed, the final step is to test and commission the solar shingle system. This involves:
Conducting electrical tests
Electrical tests are performed to ensure that the solar shingles are functioning correctly and producing the expected electricity output. These tests verify the system’s efficiency and safety, providing peace of mind for both the installer and the homeowner.
Finalizing the installation and connecting to the electrical system
After successful testing, the installation is finalized by connecting the solar shingles to the electrical system of the home. This step allows the electricity generated by the solar shingles to be used directly or stored in batteries for later use.
By following these steps, your solar shingle installation will be completed smoothly and efficiently. Remember to consult with a professional installer to ensure a safe and successful project. With solar shingles in place, you can enjoy the benefits of renewable energy while adding value to your home.
Credit: www.jacksoncontractingsite.com
Maintaining And Troubleshooting Solar Shingles
Proper maintenance and troubleshooting of solar shingles are essential for ensuring their optimal performance and longevity. Regular upkeep and timely resolution of any issues can help you maximize the benefits of your solar shingle system. In this section, we will discuss some important tips for maintaining solar shingles and common troubleshooting issues, along with their solutions.
Regular Maintenance Tips For Solar Shingles
Maintaining solar shingles requires some basic care, which can help prolong their lifespan and ensure efficient energy generation. Here are some regular maintenance tips:
- Inspect the solar shingles periodically for any signs of damage or wear.
- Clear any debris, leaves, or branches that may accumulate on the surface of the shingles.
- Keep the shingles clean by gently washing them with water and a mild soap solution.
- Check the interconnections between the shingles to ensure they are secure and properly sealed.
- Monitor the performance of your solar shingles using the inverter system or any monitoring software provided by the manufacturer.
Common Troubleshooting Issues And Solutions
Sometimes, solar shingles may encounter certain issues that can affect their efficiency. Here are some common troubleshooting problems and their solutions:
| Issue | Solution |
|---|---|
| Solar shingle not producing electricity | Check the connections and ensure they are tight and properly secured. Verify that the inverter is functioning correctly. If the problem persists, consult a professional solar technician. |
| Reduced energy output | Inspect the surface of the shingles for any shading caused by debris or vegetation. Clean the shingles and remove any obstructions that may be blocking sunlight. If the issue persists, it may indicate a more significant problem, and professional assistance is recommended. |
| System shutdown or error messages | Refer to the manufacturer’s user manual or technical documentation to understand the specific error code or message. Follow the troubleshooting steps provided, or contact the manufacturer’s customer support for assistance. |
By following these maintenance tips and troubleshooting guidelines, you can ensure that your solar shingles continue to generate clean, renewable energy efficiently. Regular inspections and prompt resolution of any issues can help you enjoy the numerous benefits of solar energy for years to come.
Frequently Asked Questions For How Are Solar Shingles Installed
What Are The Drawbacks Of Solar Shingles?
Solar shingles have some drawbacks compared to solar panels: higher installation costs, lower efficiency rating, and limited availability.
How Do They Attach Solar Panels To Roof?
Solar panels are attached to the roof deck directly, replacing conventional roofing shingles. They are installed during new construction or when replacing an old or damaged roof, and not mounted on racks like other solar panels. Solar shingles capture sunlight to produce electricity and enhance the aesthetic of the roof.
How Long Does It Take To Install Solar Shingles?
Solar shingles can be installed in a short time frame. The installation process usually takes a few days, depending on the size of the project and the complexity of the roof. The time required for installation may vary, so it is best to consult with a professional installer for an accurate estimate.
How Does Solar Roof Shingles Work?
Solar Roof shingles work by capturing sunlight through various components, including PV tiles and non-PV tiles. These components convert the sunlight into DC electricity and then convert it to AC electricity that can be used to power appliances. They are attached directly to the roof deck, replacing conventional roofing shingles.
Solar shingles are typically installed during new construction or when replacing an old or damaged roof.
Conclusion
The installation process of solar shingles involves several key steps. These include placing the starter strip, wiring the shingles and ensuring interconnections between them, installing the top flashing, and implementing proper venting and ice and water shield. It is important to note that solar shingles are attached directly to the roof deck, unlike traditional solar panels.
While there may be some drawbacks, such as higher installation costs and lower efficiency ratings, solar shingles offer a unique and aesthetically pleasing way to harness solar energy.